Schoology (free)
Note: If your school has a partnership with PlayPosit, you have access to the upgraded version of the PlayPosit/Schoology integration. Read more here.
If you use Schoology as your Learning Management System (LMS), you can assign PlayPosit bulbs to students directly inside Schoology.
Create an instructor account
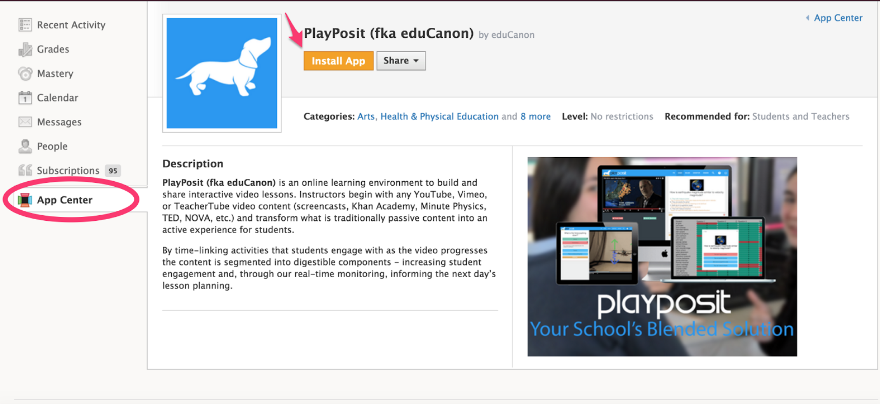
- From the Schoology App Center, find PlayPosit and Install App
 Note: When installing the app, do not select 'Course Admins Only' as your students will be unable to view PlayPosit content.
 - PlayPosit will appear in the left sidebar. Launching the app will automatically create a PlayPosit instructor account for you.
 Note: When installing the app, do not select 'Course Admins Only' as your students will be unable to view PlayPosit content.
 Assign a bulb to learners
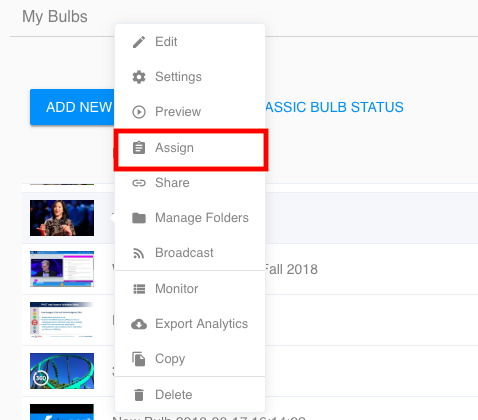
- Find the bulb you want to assign. Click the bulb icon or the triple dots > Assign.
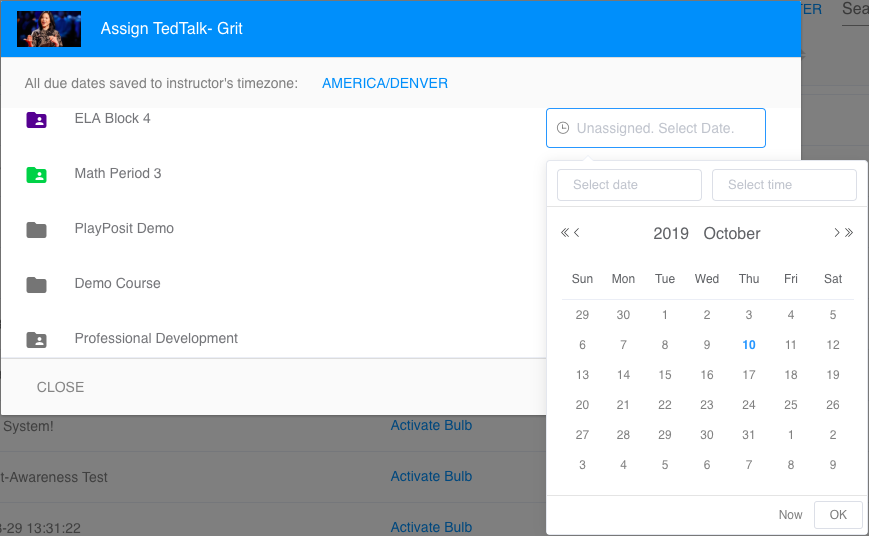
- Select the class to assign the bulb to and assign a due date.
- The bulb has successfully been assigned to the course. Have learners navigate to the Schoology course and launch the PlayPosit App from the left sidebar to complete the bulb.


Note: With the free integration, only one bulb can be assigned to learners at a time.
Monitor learner responses
- Launch the PlayPosit App from the left sidebar.
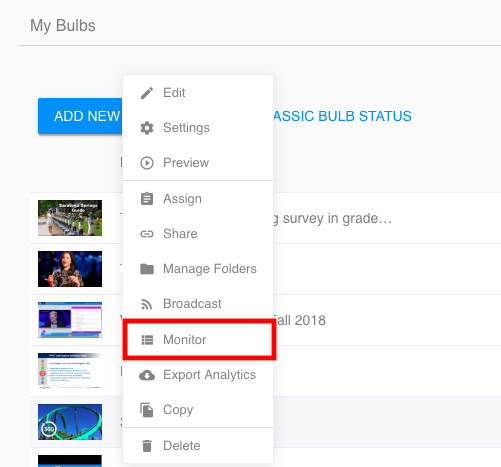
- Find the bulb you want to view data for. Click on the bulb icon or the triple dots > Monitor.

Note: Grades from PlayPosit are not automatically synced with Schoology using the free integration.
To take advantage of the full PlayPosit experience, including roster sync, gradebook sync, and many other features, a PlayPosit school license with LTI integration is required. Interested in having your organization administrator schedule a demo? Click here!