New Teacher Center - instructor's workflow
In this article
- Create classes
- Assign bulbs for internal staff (Okta)
- Assign bulbs for external learners (partners)
- Assign playlists for internal staff (Okta)
- Assign playlists for external learners (partners)
- Enroll internal staff (Okta) in the class
- Enroll external learners (partners) in the class
- Learner experience
- Best practices for departing NTC instructors
- FAQ
Create classes
Please follow the instructions in this article to create a class.
Assign bulbs for internal staff (Okta)
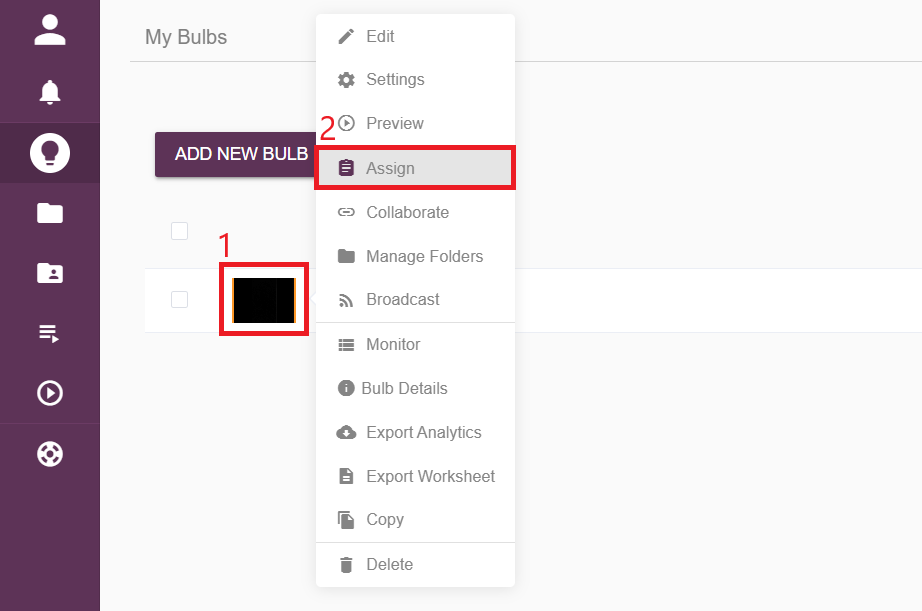
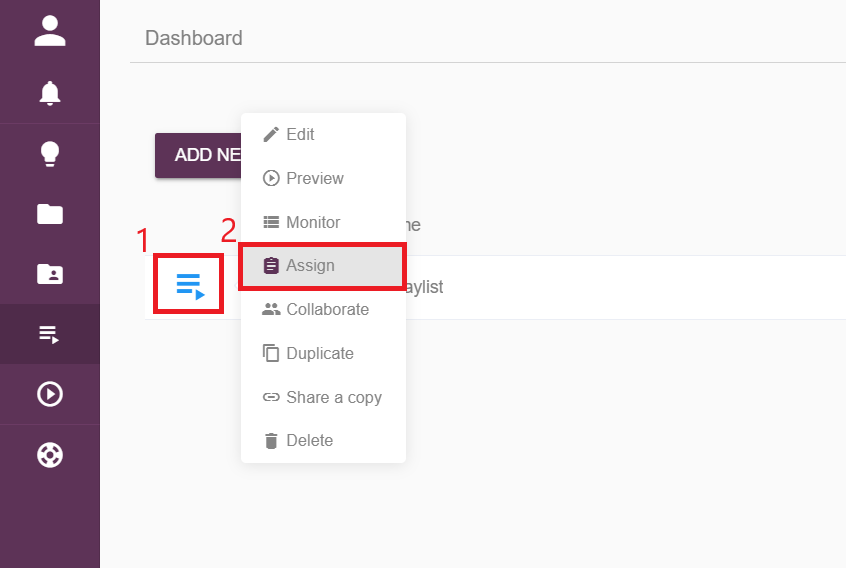
- Go to My Bulbs page, click on the thumbnail image or the triple dots icon behind the desired bulb, and select Assign.
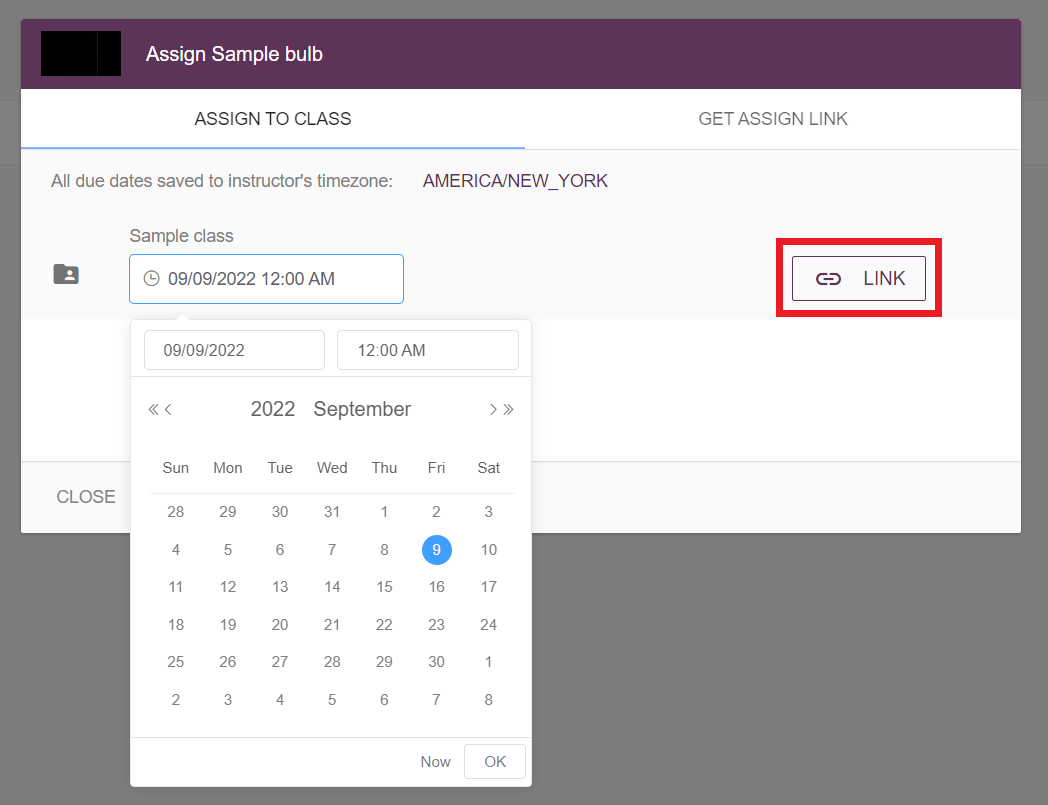
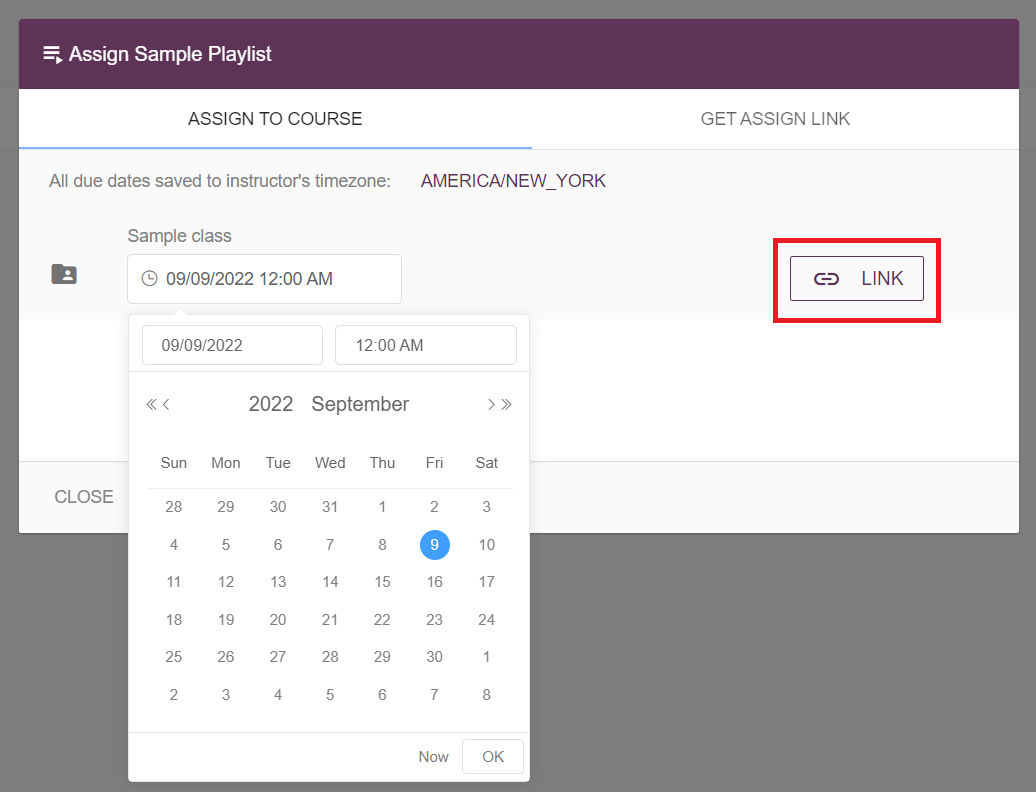
On the popup window, find the class to which the instructor would like to assign the bulb, and pick a due date by clicking on the input section below the class. Then click on Link to view the assign link.
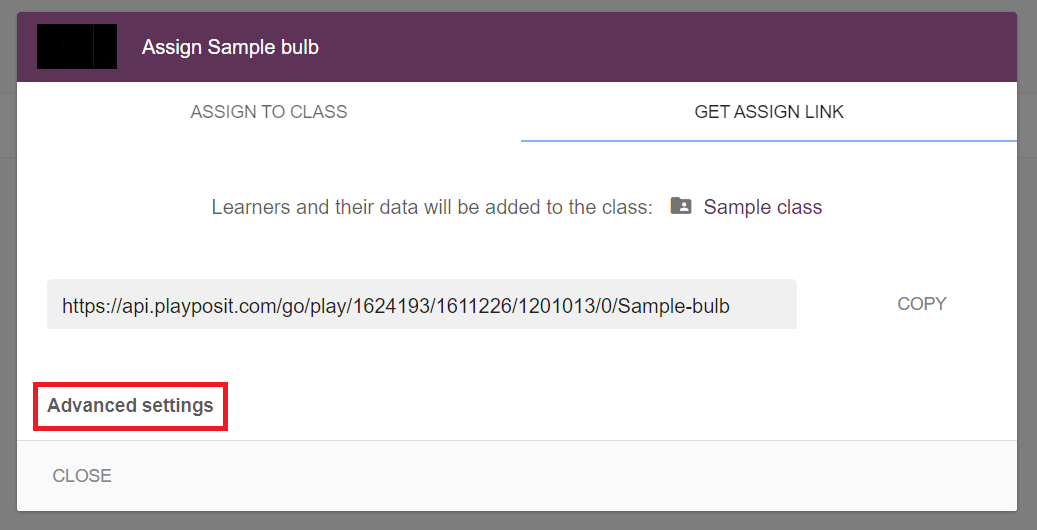
Please configure the settings for the link before copying it. Click on Advanced settings to expand the settings.
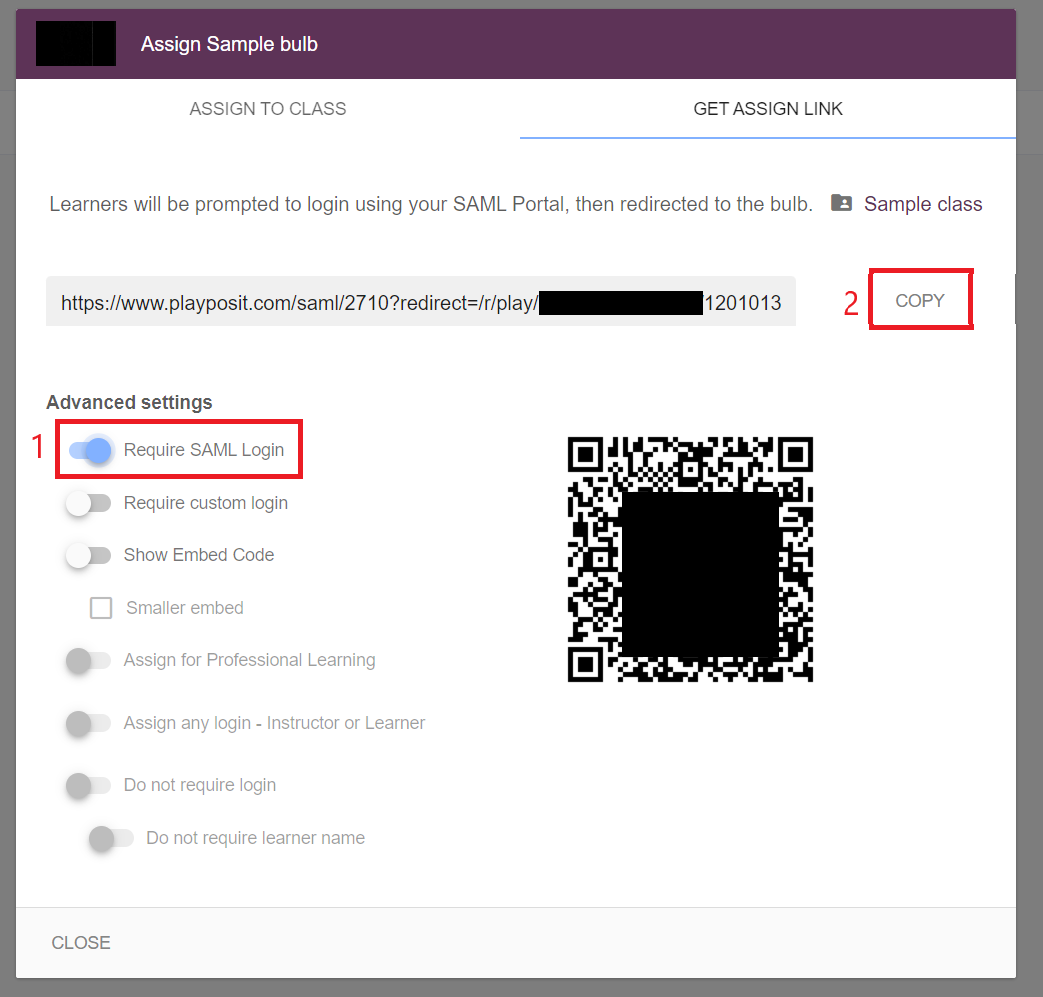
For the bulb that is assigned for internal use with NTS’s staff, and the learners will log in through the OKTA log-in, please toggle on the “ Require SAML Login” option. After configuring the settings, click on Copy to copy the link and share it with the learners.


Assign bulbs for external learners (partners)
- Go to My Bulbs page, click on the thumbnail image or the triple dots icon behind the desired bulb, and select Assign.
- On the popup window, find the class to which the instructor would like to assign the bulb, and pick a due date by clicking on the input section below the class. Then click on Link to view the assign link.
- Please configure the settings for the link before copying it. Click on Advanced settings to expand the settings.
- For external learners, there are two ways to assign the bulb to them:
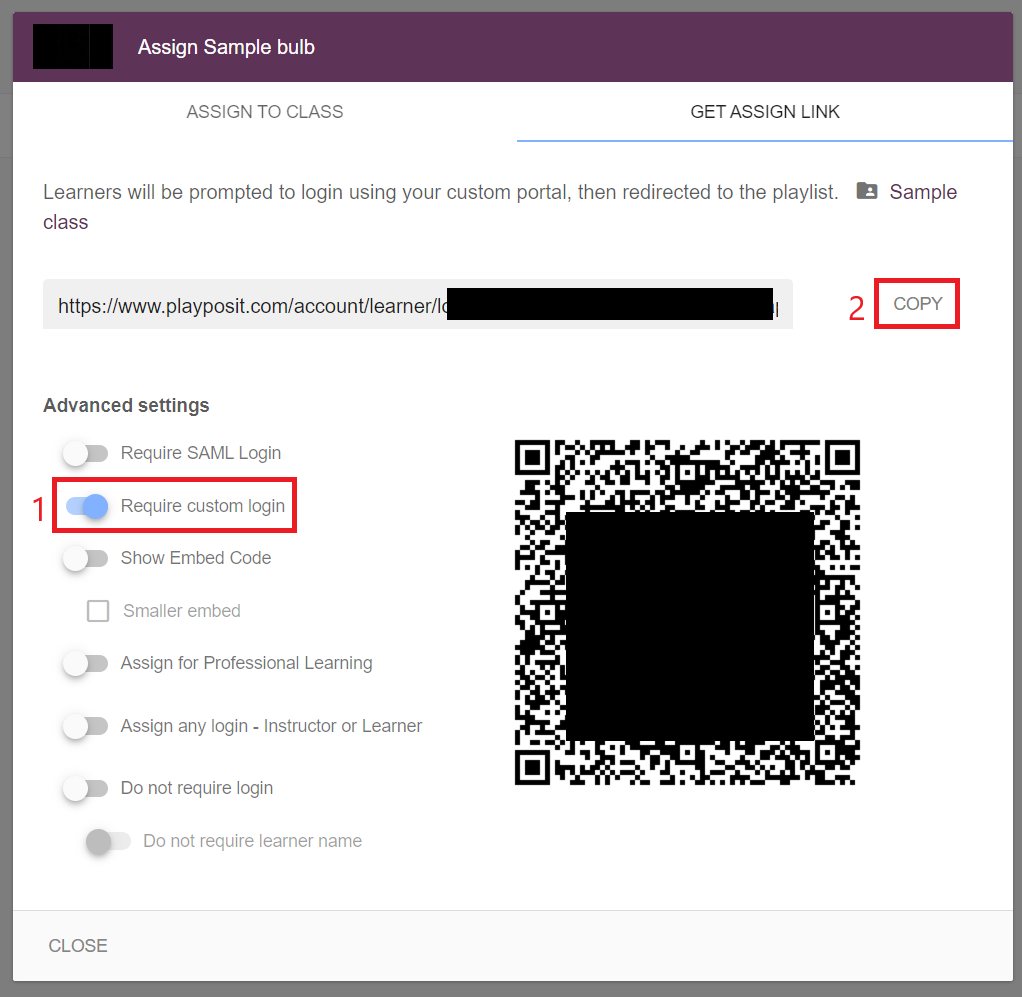
- For the bulb that is assigned to external users with login information, please toggle on the “Require custom login” option. After configuring the settings, click on Copy to copy the link and share it with the learners.
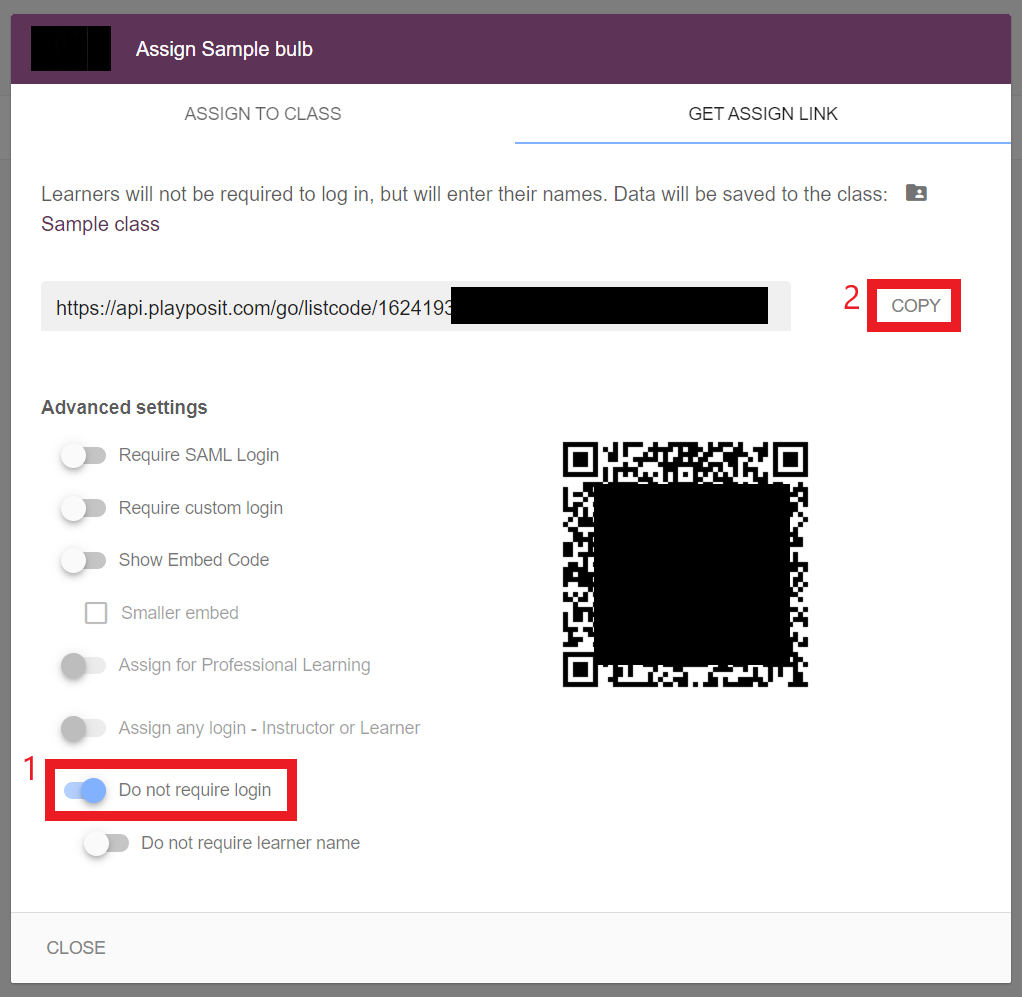
- If the learner does not have an account or the instructor doesn’t want learners to log in, please toggle on the “Do not require login” option. After configuring the settings, click on Copy to copy the link and share it with the learners.
- For the bulb that is assigned to external users with login information, please toggle on the “Require custom login” option. After configuring the settings, click on Copy to copy the link and share it with the learners.


Assign playlists for internal staff (Okta)
Go to the Playlists page, click on the playlist’s icon or the triple dots icon behind the desired playlist, and select Assign.
On the popup window, find the class to which the instructor would like to assign the playlist, and pick a due date by clicking on the input section below the class. Then click on Link to view the assign link.
Please configure the settings for the link before copying it. Click on Advanced to expand the settings.
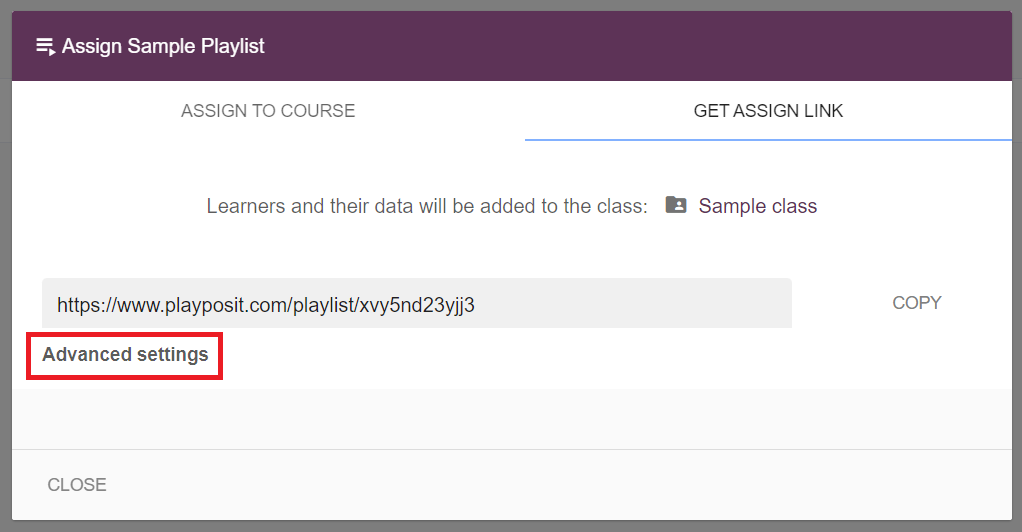
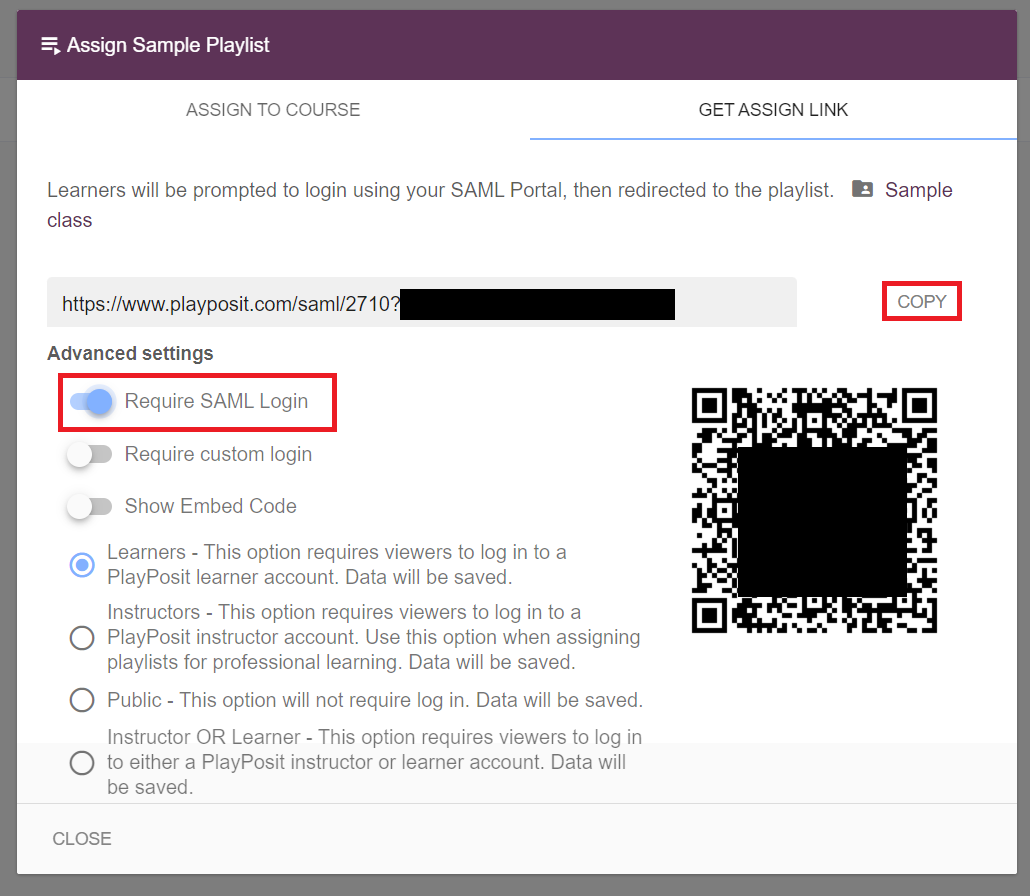
For the playlist that is assigned for internal use with NTS’s staff, and the learners will log in through the OKTA log-in, please toggle on the “ Require SAML Login” option. After configuring the settings, click on Copy to copy the link and share it with the learners.


Assign playlists for external learners (partners)
- Go to the Playlists page, click on the playlist’s icon or the triple dots icon behind the desired playlist, and select Assign.
- On the popup window, find the class to which the instructor would like to assign the playlist, and pick a due date by clicking on the input section below the class. Then click on Link to view the assign link.
- Please configure the settings for the link before copying it. Click on Advanced to expand the settings.
- For external learners, there are two ways to assign the bulb to them:
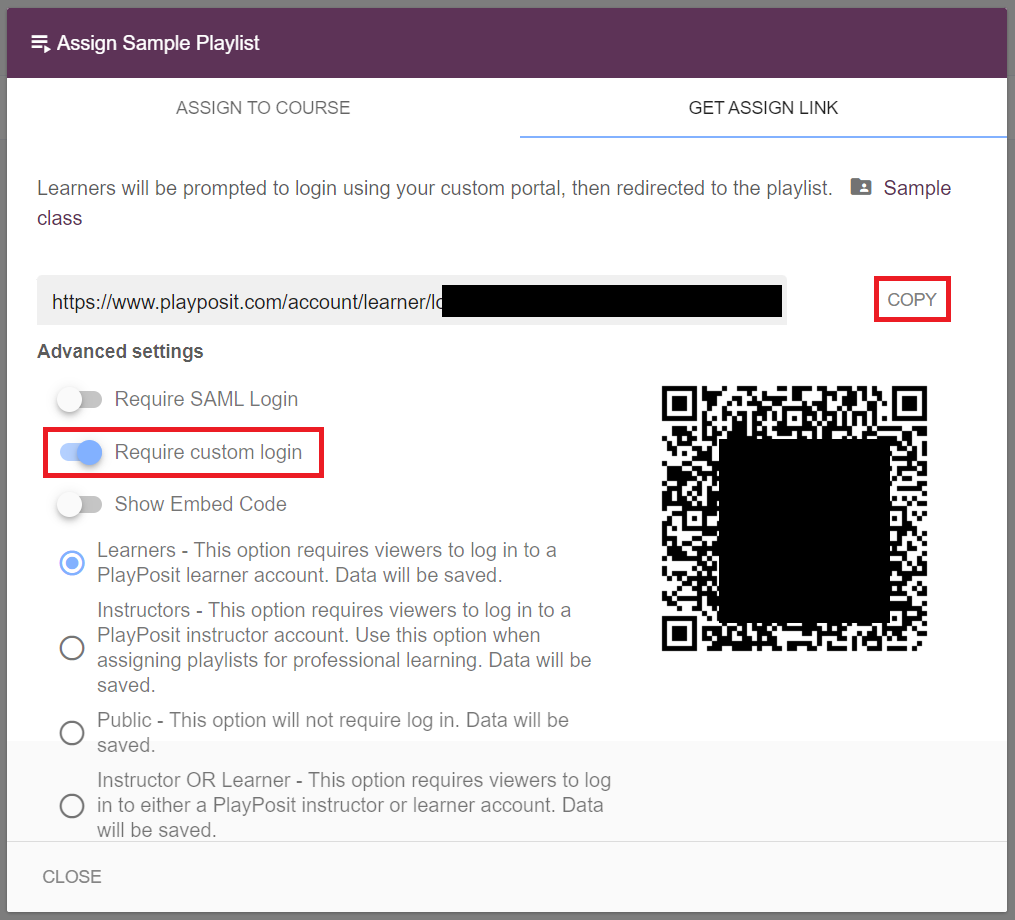
- For the playlist that is assigned to external users with login information, please toggle on the “Require custom login” option. After configuring the settings, click on Copy to copy the link and share it with the learners.
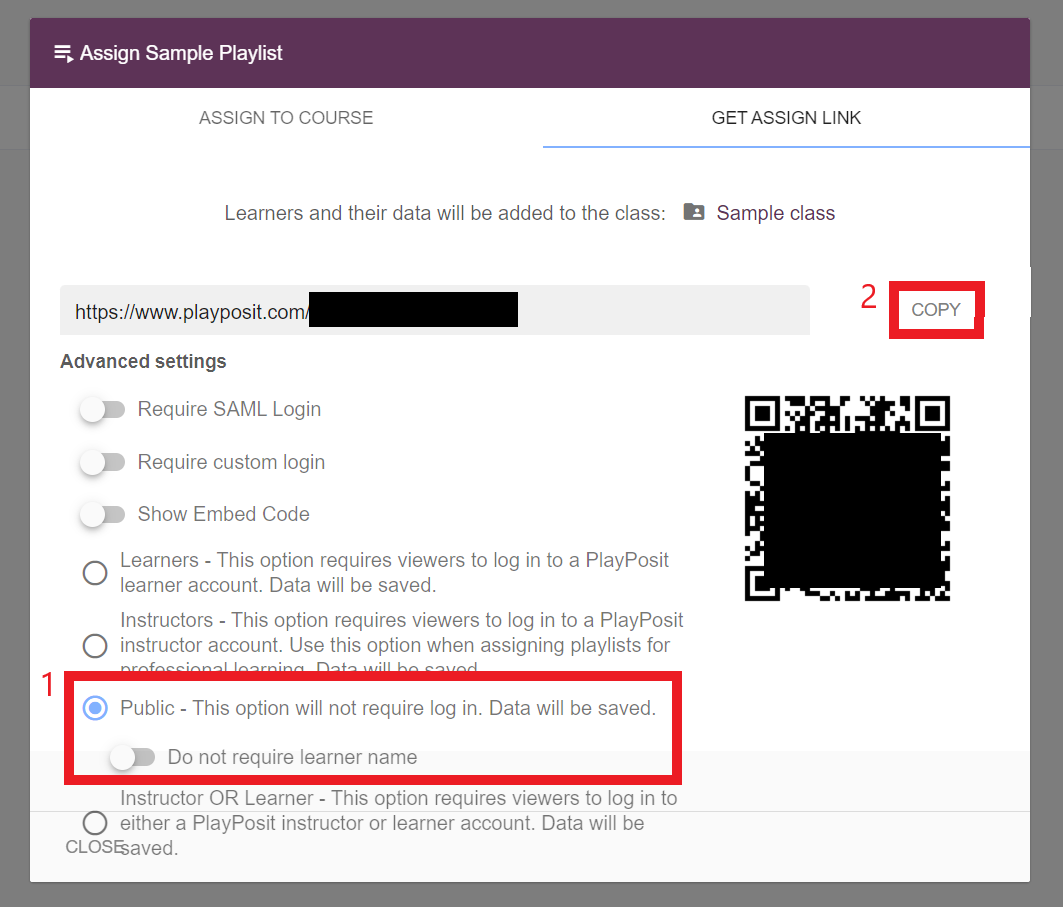
- If the learner does not have an account or the instructor doesn’t want learners to log in, please select the Public option. After configuring the settings, click on Copy to copy the link and share it with the learners.
- For the playlist that is assigned to external users with login information, please toggle on the “Require custom login” option. After configuring the settings, click on Copy to copy the link and share it with the learners.


Enroll internal staff (Okta) in the class
If multiple bulbs or playlists are assigned for learners to choose among, instructors may enroll learners in the class with the class link that will direct learners to log in through Okta. After logging in, learners will be automatically redirected to the assigned class/section to view all the content in the class. Please follow the steps below to access the class link.
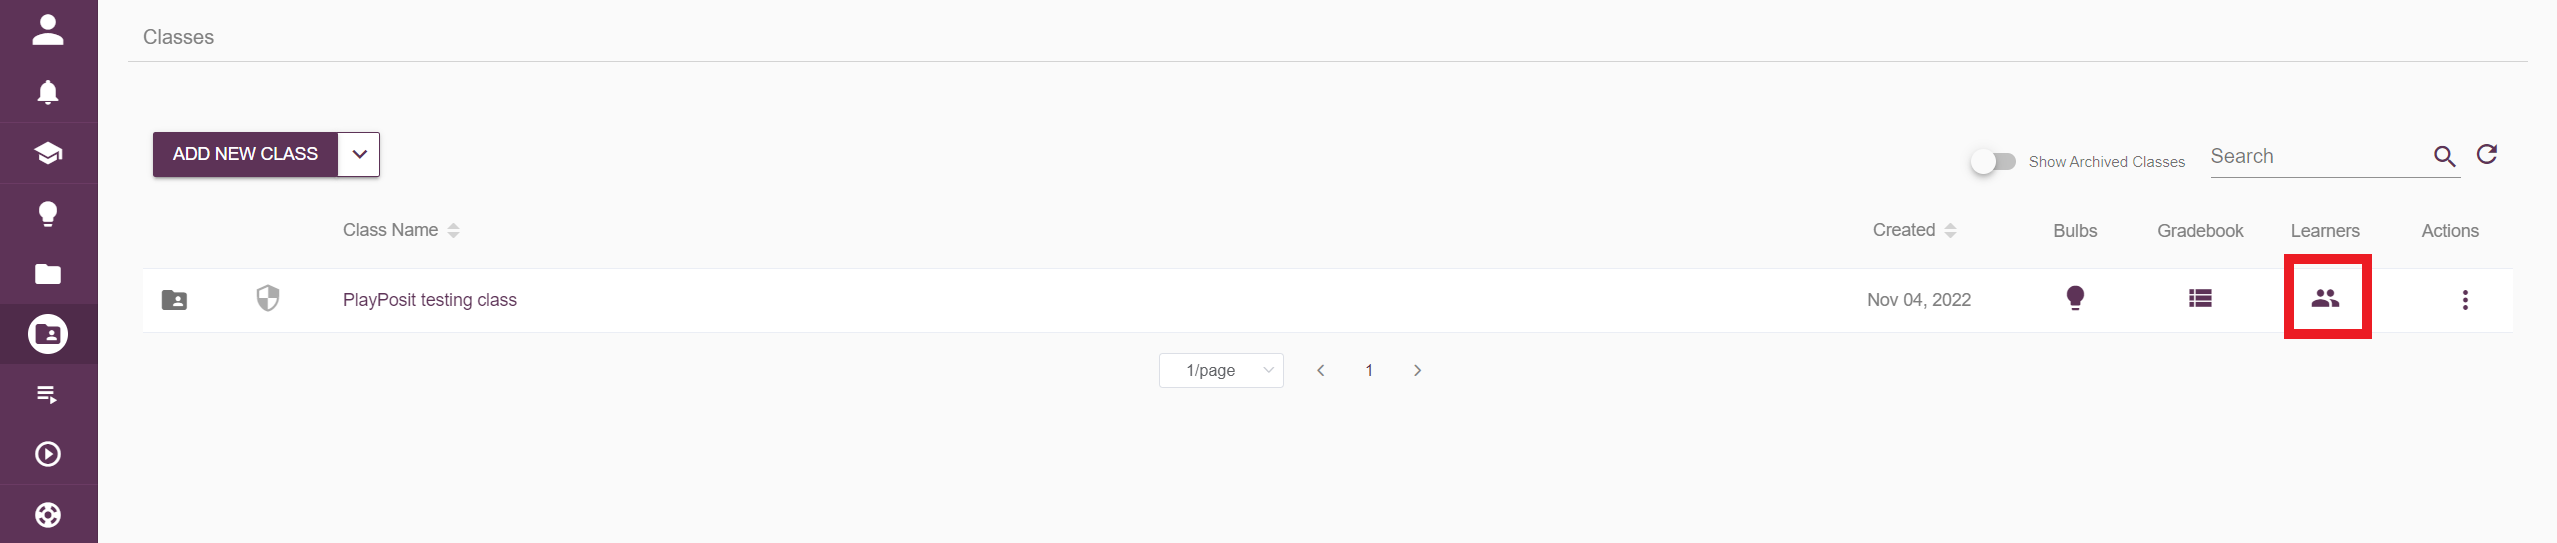
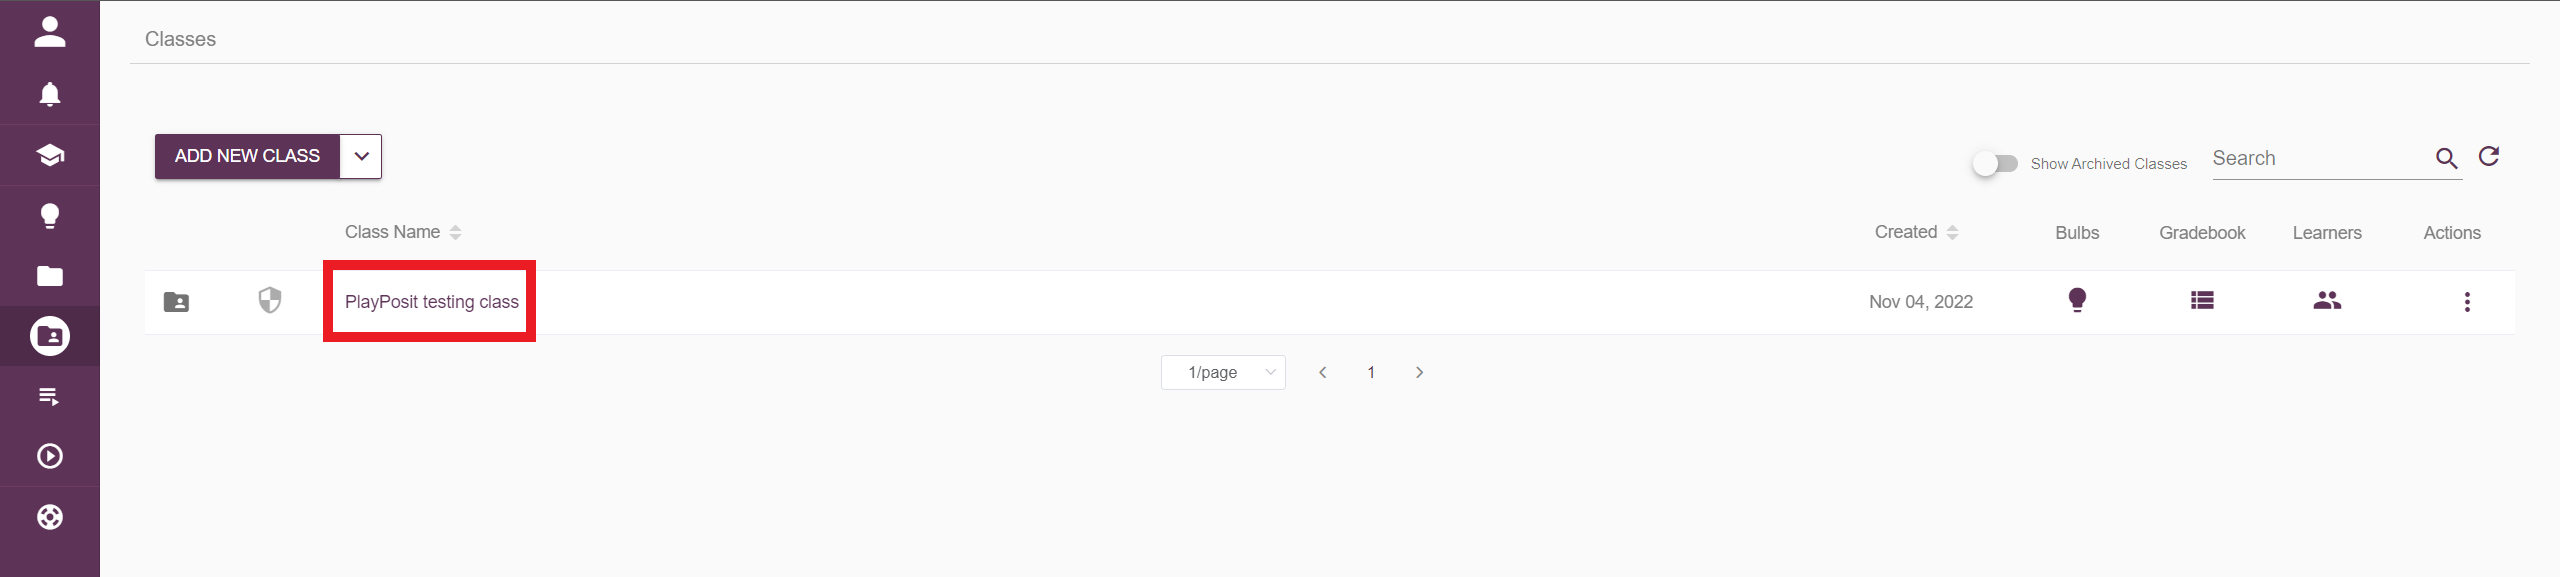
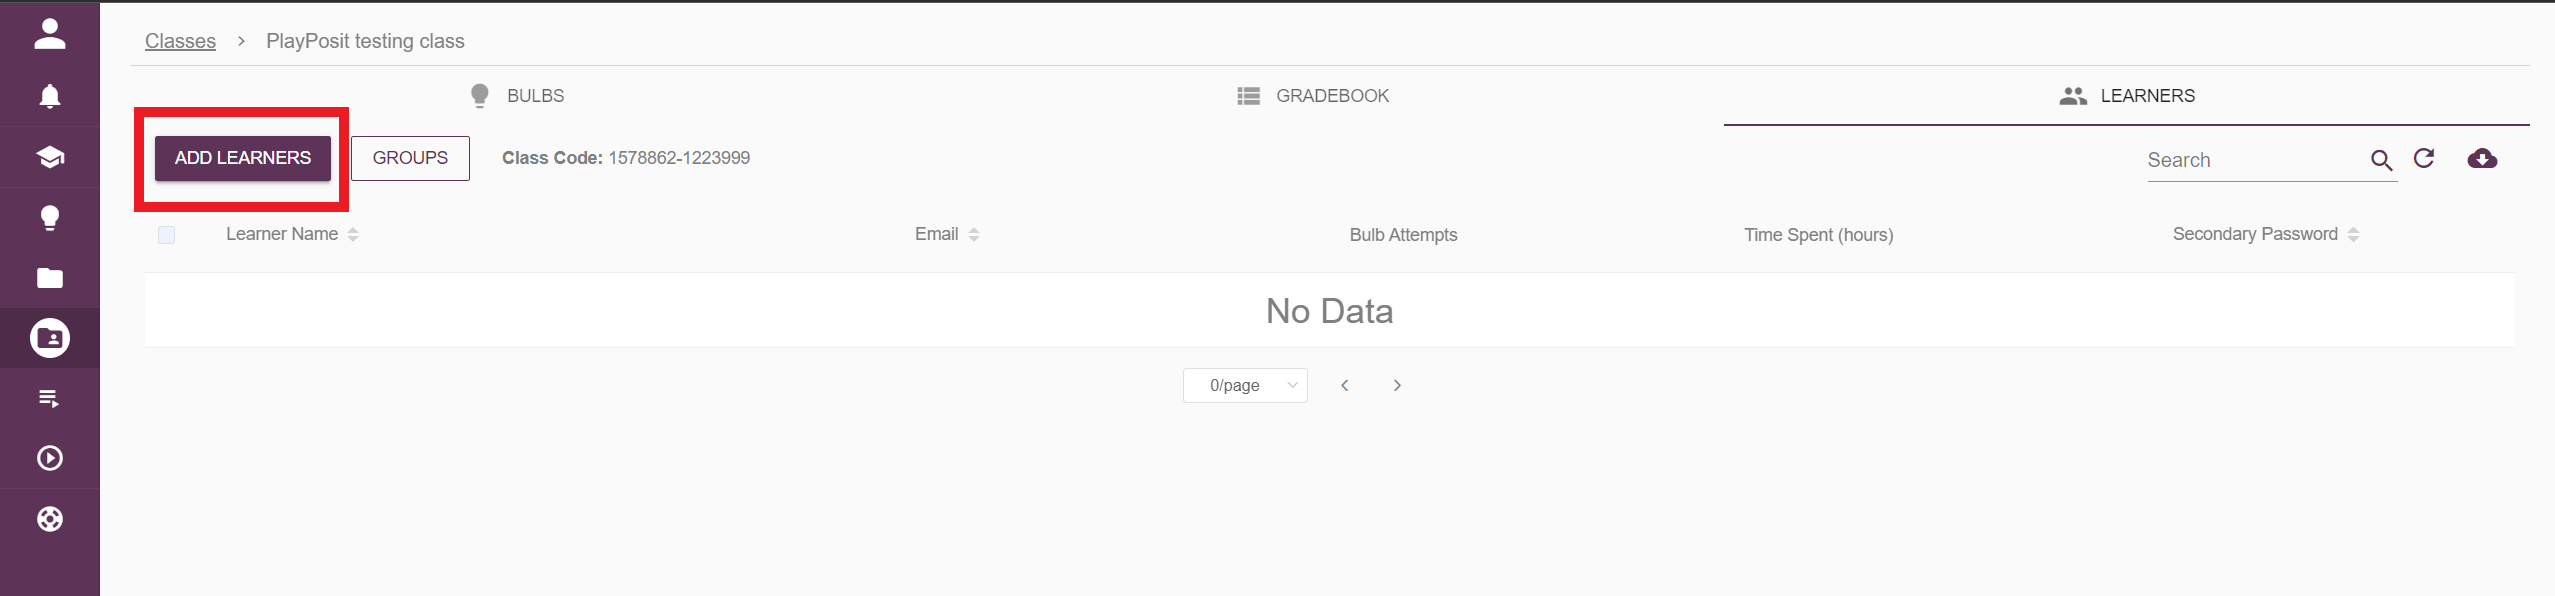
- On the classes page, click the learners icon behind the desired class.
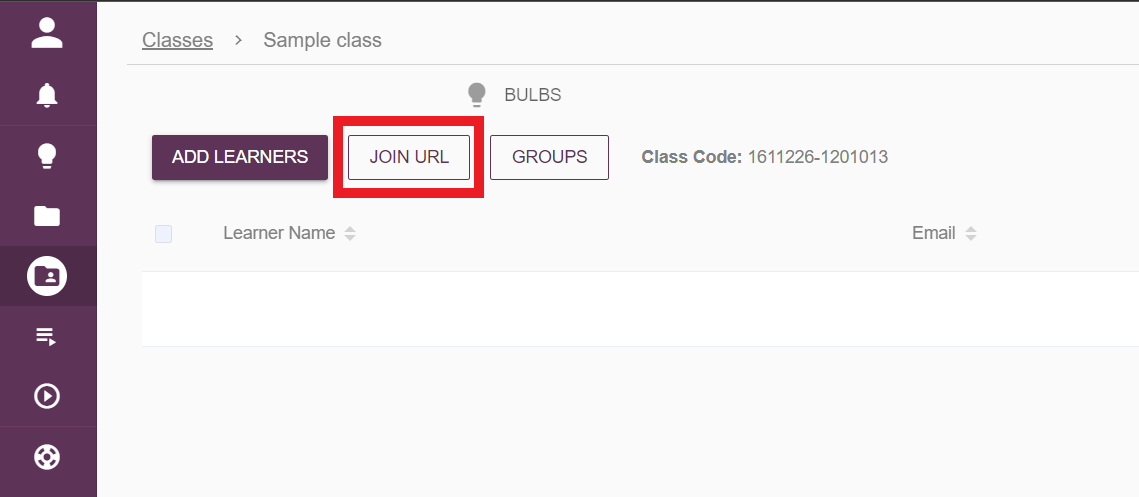
Select Join URL on the top left.
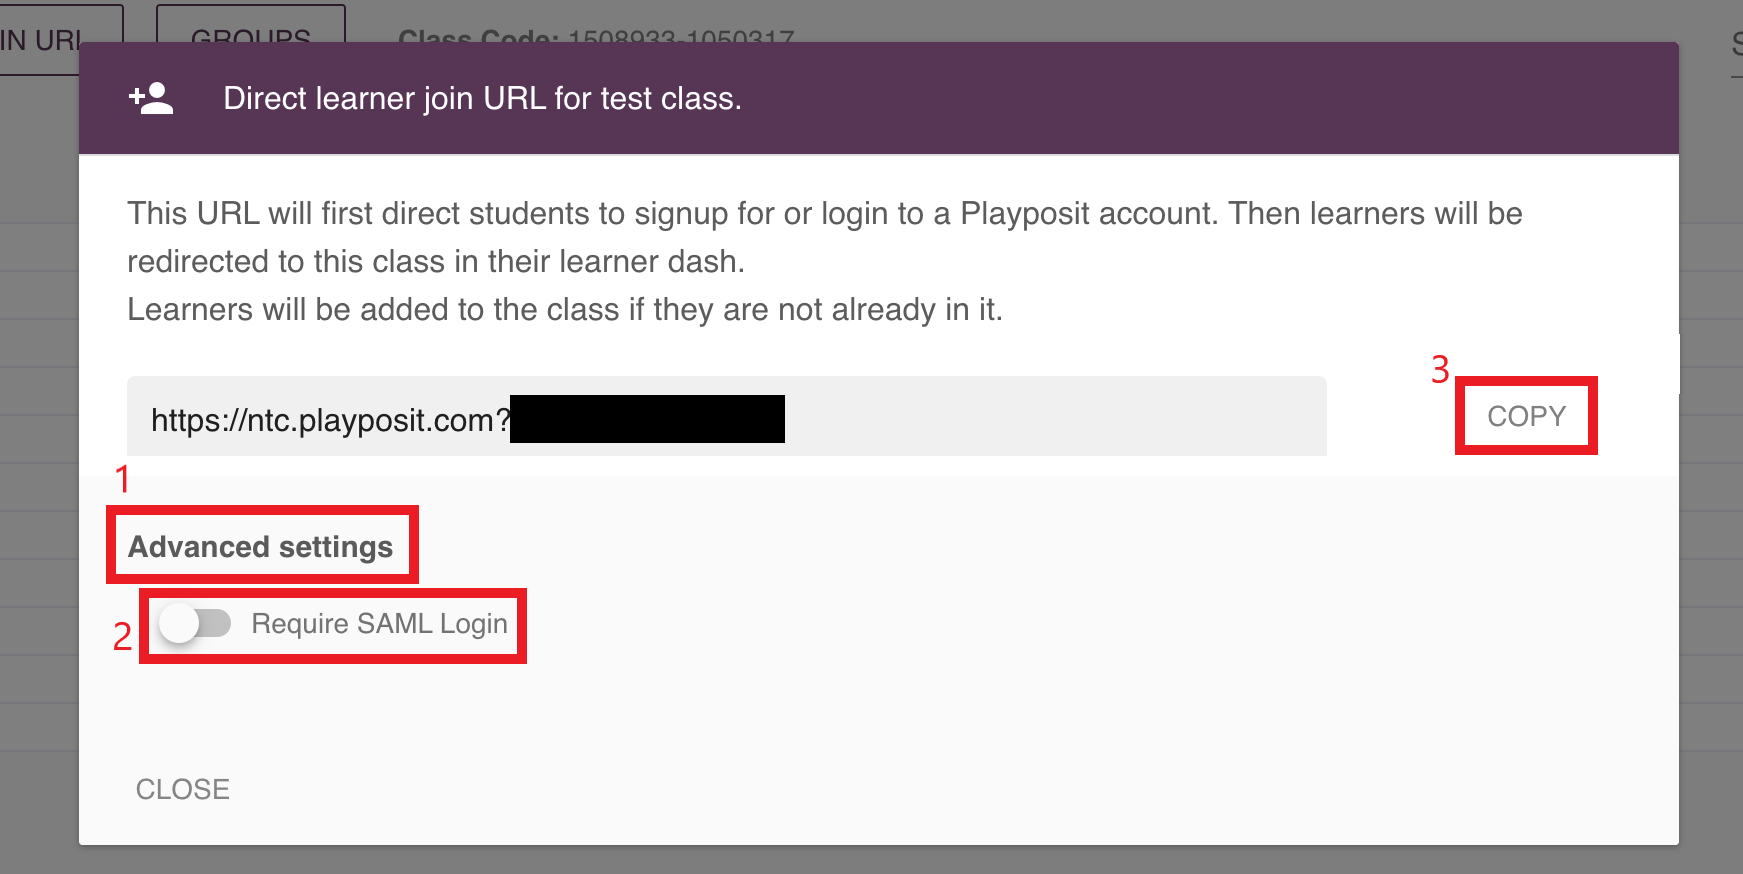
Expand the Advanced settings, and toggle on the Require SAML login option. Then copy the class link, and share it with learners.
When learners open the link, they will log in to their accounts through Okta. After logging in, they will see the assigned class's dashboard with all the class content.


Enroll external learners (partners) in the class
If multiple bulbs or playlists are assigned for learners to choose among, instructors may enroll learners in the class with the class link that will direct learners to log in through ntc.playposit.com. After logging in, learners will be automatically redirected to the assigned class/section to view all the content in the class. Please follow the steps below to access the class link.
- On the classes page, click the learners icon behind the desired class.
Select Join URL on the top left.
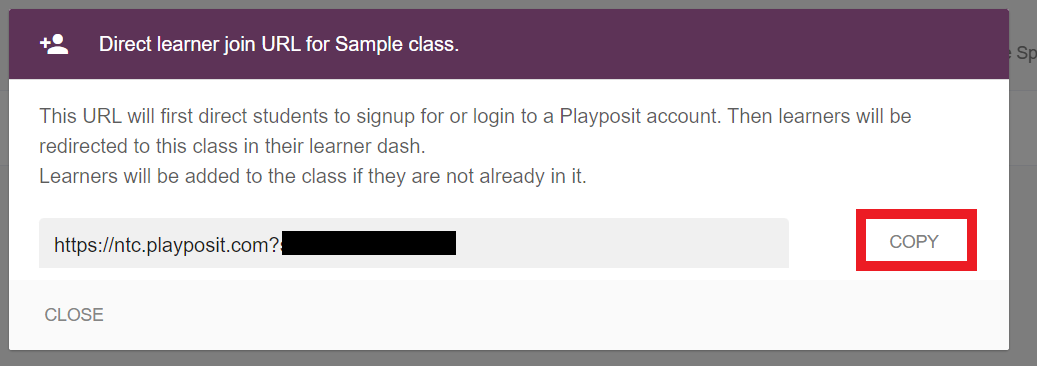
Copy the class link, and share it with learners.
When learners open the link, they will be directed to ntc.playposit.com to log in to their account. After logging in, they will see the assigned class's dashboard with all the class content.


Learner experience
- NTC internal users and staff: When learners click on the link to the bulb or playlist, they will be directed to the OKTA log-in page. They can access the bulb or playlist after logging in.

External learners: When external learners click on the link to the bulb or playlist, they will be directed to the custom log-in page. They can access the bulb or playlist after logging in.
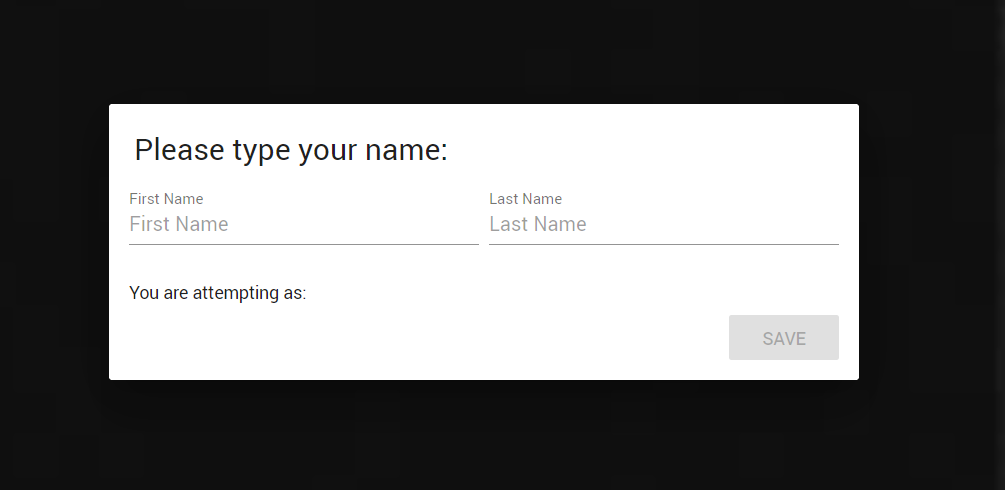
Bulbs and playlists that do not require login: When learners click on the link to the bulb or playlist that does not require login, they will see a popup window that requires them to enter their names before taking the bulb or playlist.


Best practices for departing NTC instructors
Transfer bulbs
Please follow the steps in this article to transfer ownership of the bulbs.
- If the departing instructor knows who will assume their duties and responsibility for their bulbs, then they should transfer ownership to that person.
- If it is unclear who will assume the departing instructor’s duties, please transfer the bulbs to the NTC senior admin (Frankey Goss), and follow up with an email to the NTC senior admin to advise them of the transfer of ownership.
Transfer classes
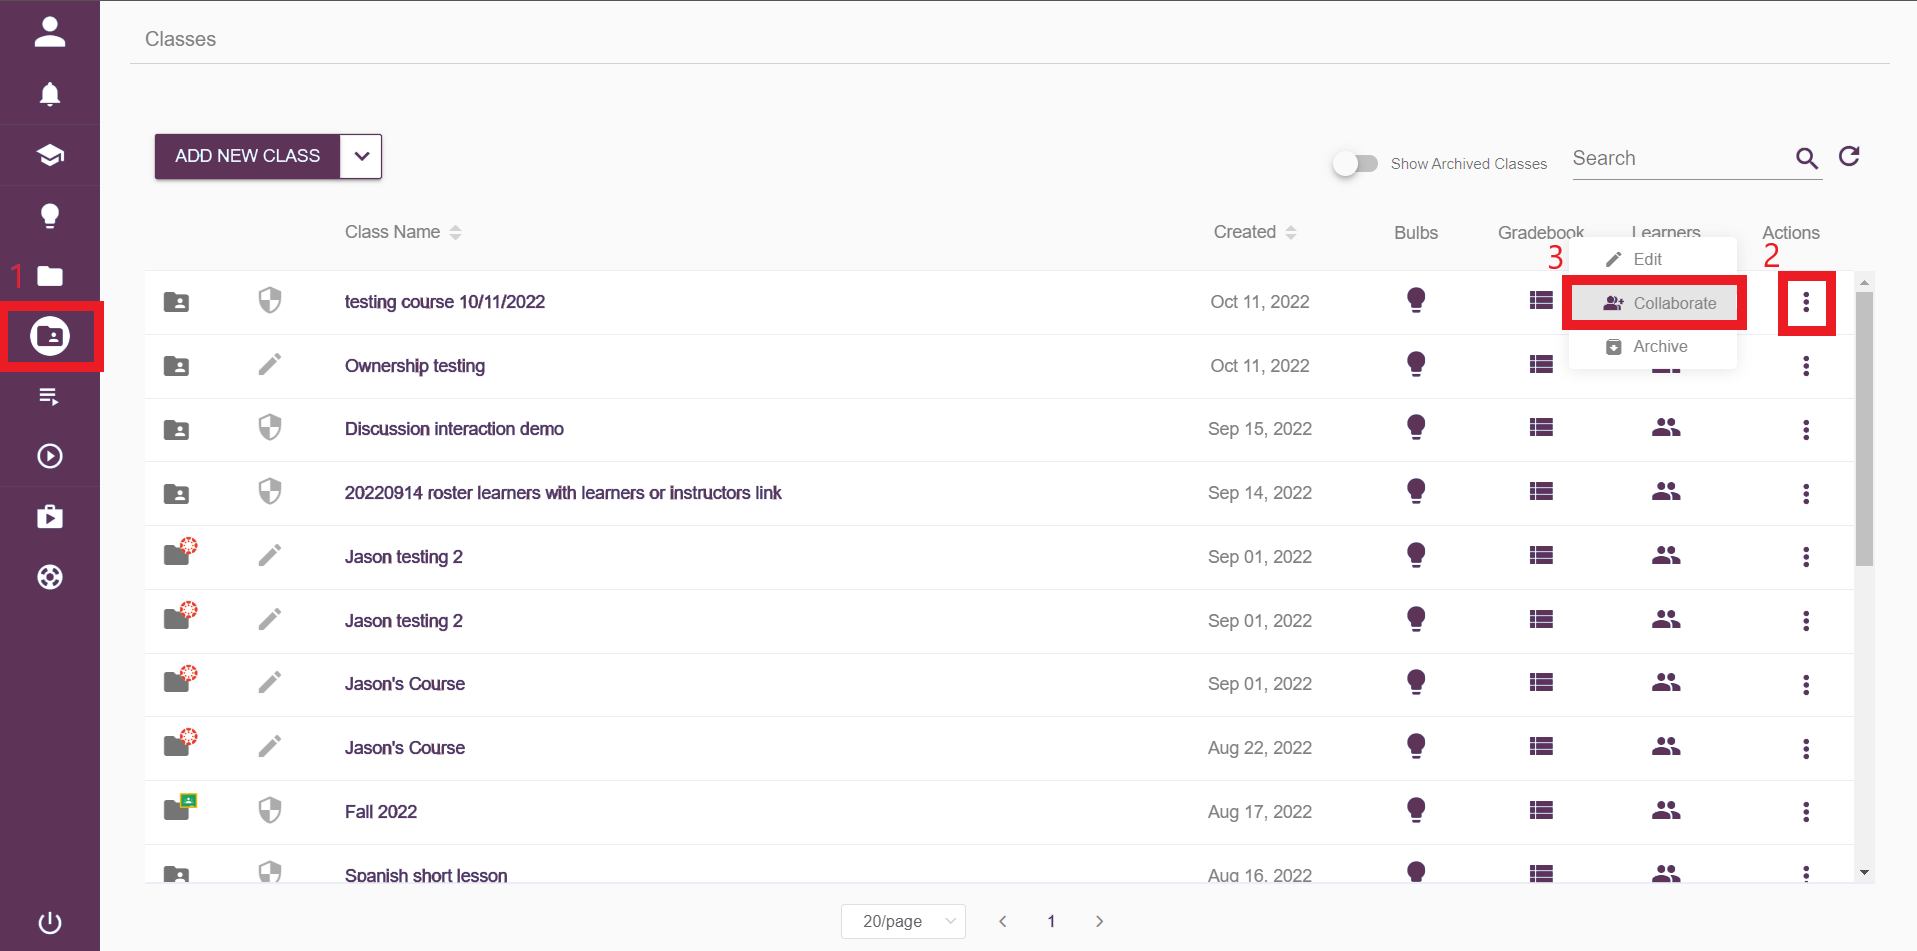
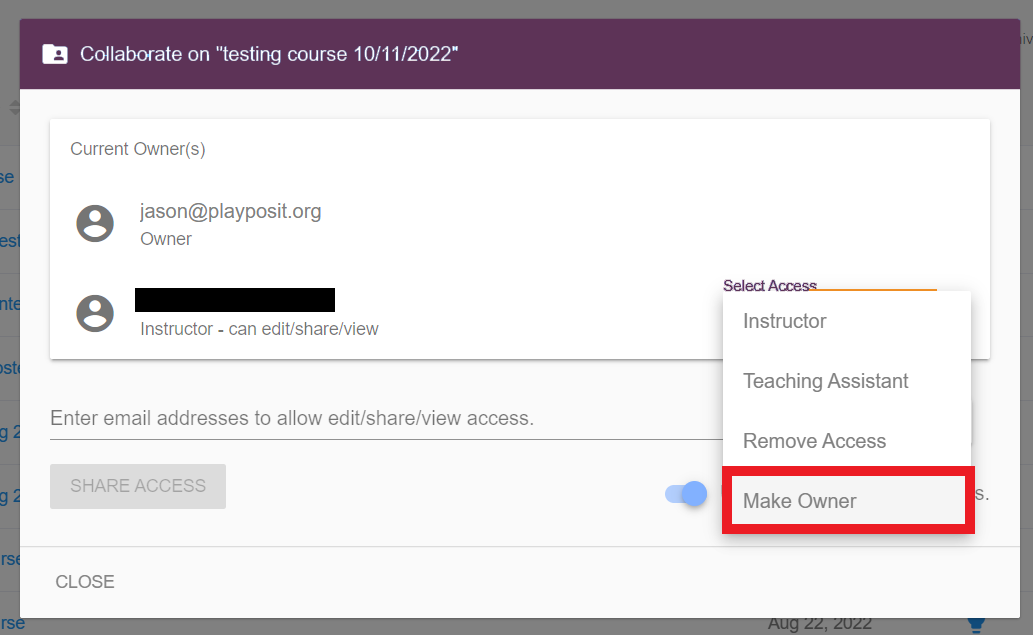
- Navigate to the Classes page, click the triple dots icon, and select Collaborate.
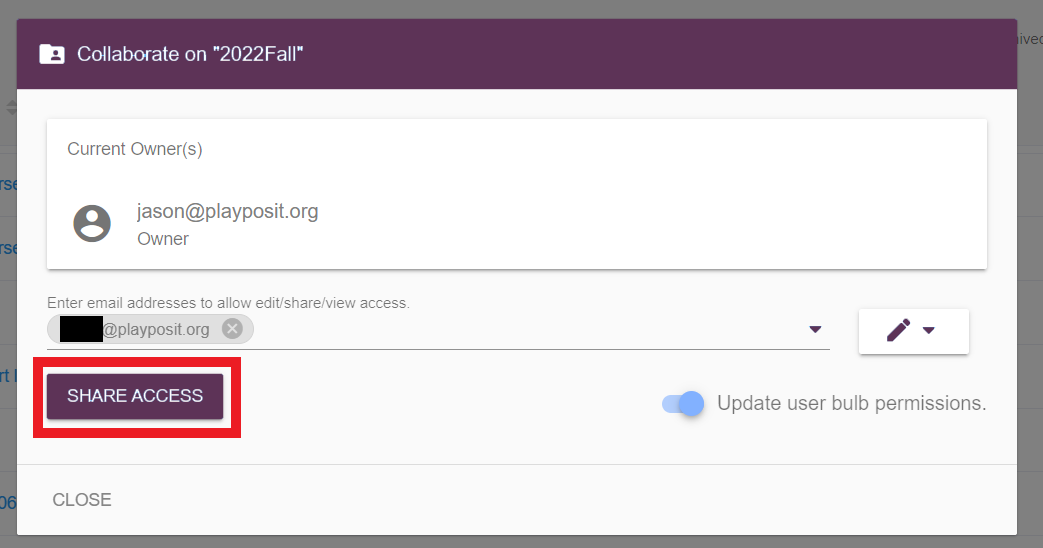
- Enter the email and click Share access to add other instructors as co-instructors.
- If the departing instructor knows who will assume their duties and responsibility for their classes, then they should add that person as a co-instructor to the classes.
- If it is unclear who will assume the departing instructor’s duties, please add the NTC senior admin (Frankey Goss) as co-instructor of the classes, and follow up with an email to the NTC senior admin to advise them of the change.
- Expand the drop-down menu behind the co-instructor, and select Make Owner.
- Click Transfer class.
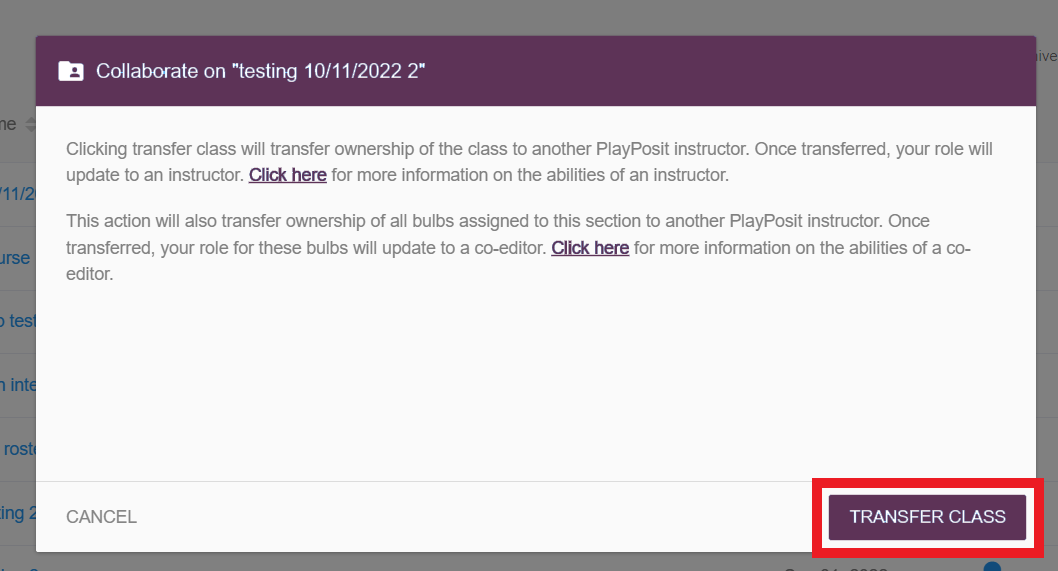
- The newly added instructor will become the owner of the class and will also be the owner of all the bulbs in this class.


FAQ
How to add instructors as teaching assistants to a class?
When instructors are added to a class as teaching assistants, they will have access to monitor bulbs and playlists and export the class data. Teaching assistants will not be able to edit the bulbs and playlists in the class. Please see more information about the differences between the class owner and teaching assistant in this article.
Only the owner of the class can add teaching assistants to the class. Please follow the steps below to add facilitators.
Click on the title of the desired class.
Select Collaborate on the top left.
Enter the email address for the instructor and change the access type to Teaching assistant.
NOTES: Teaching assistants will need access to the bulbs to monitor learners' progress. Please ensure to toggle on the “Update user bulb permissions” option when adding the teaching assistant, so the instructor will also be the facilitator of all the bulbs in the class. This option will not give teaching assistants access to edit the bulbs. 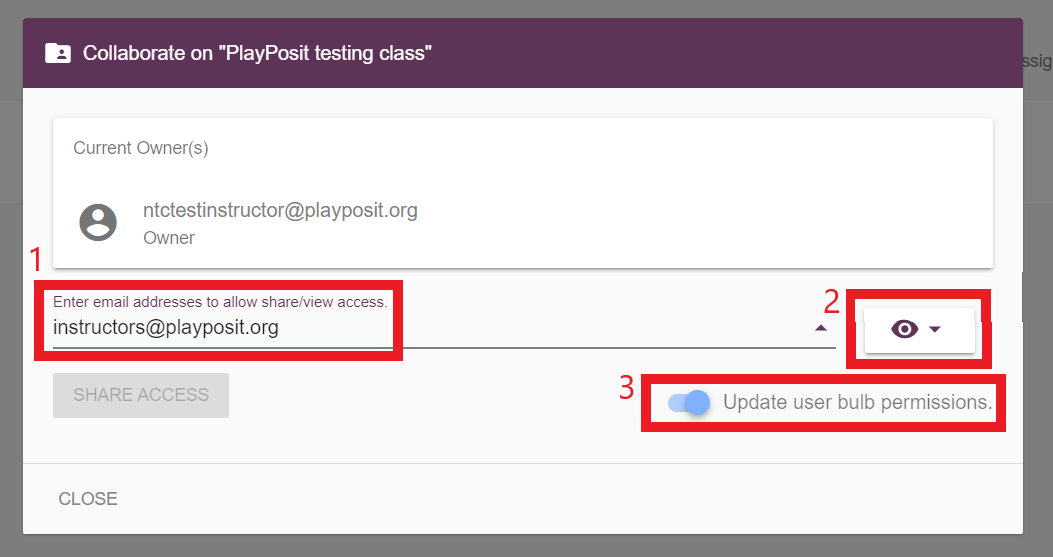


How to monitor the class as the facilitator/teaching assistant?
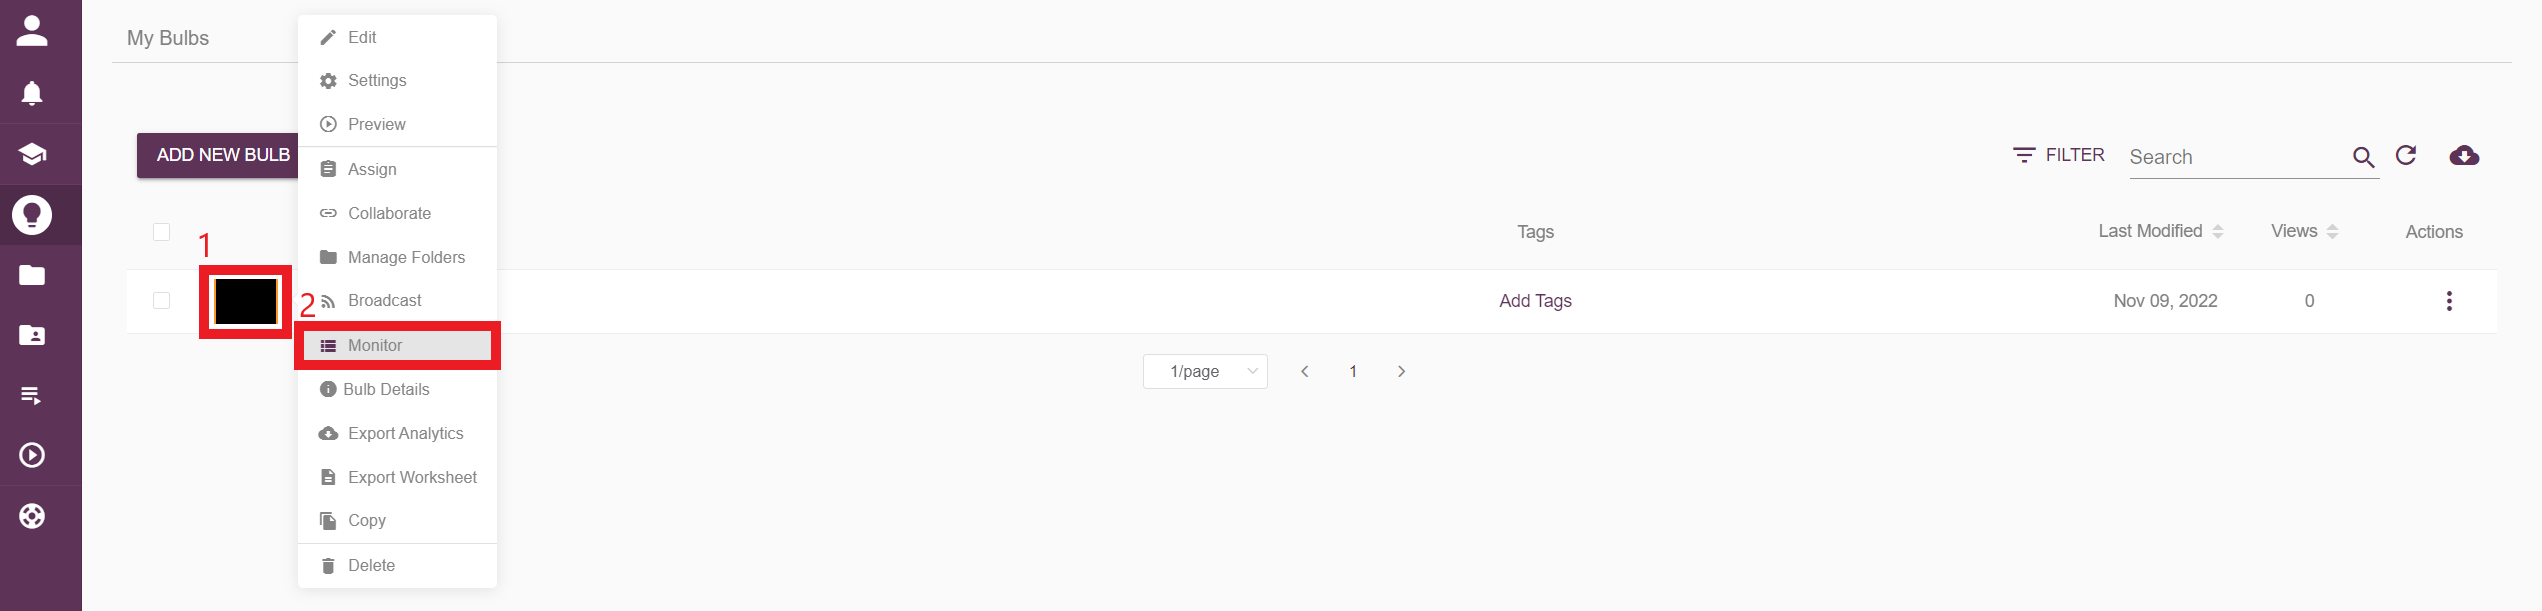
From My Bulbs page:
Click on the thumbnail image or the triple dots icon of the desired bulb, and select Monitor.
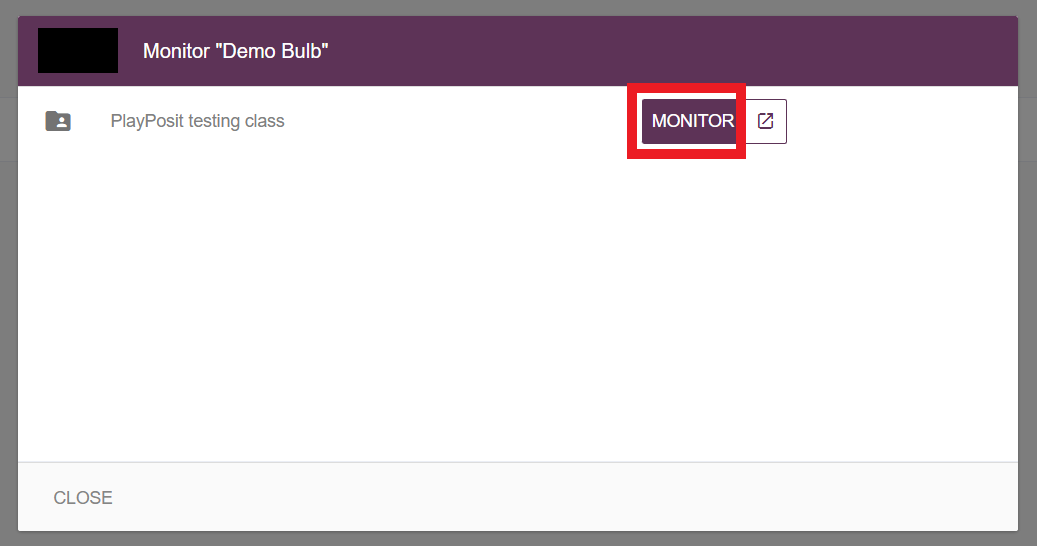
Select the class to monitor.
On the monitor page of the bulb, instructors can see learners’ responses to each interaction. Instructors can also click on the learner’s response to adjust the points.
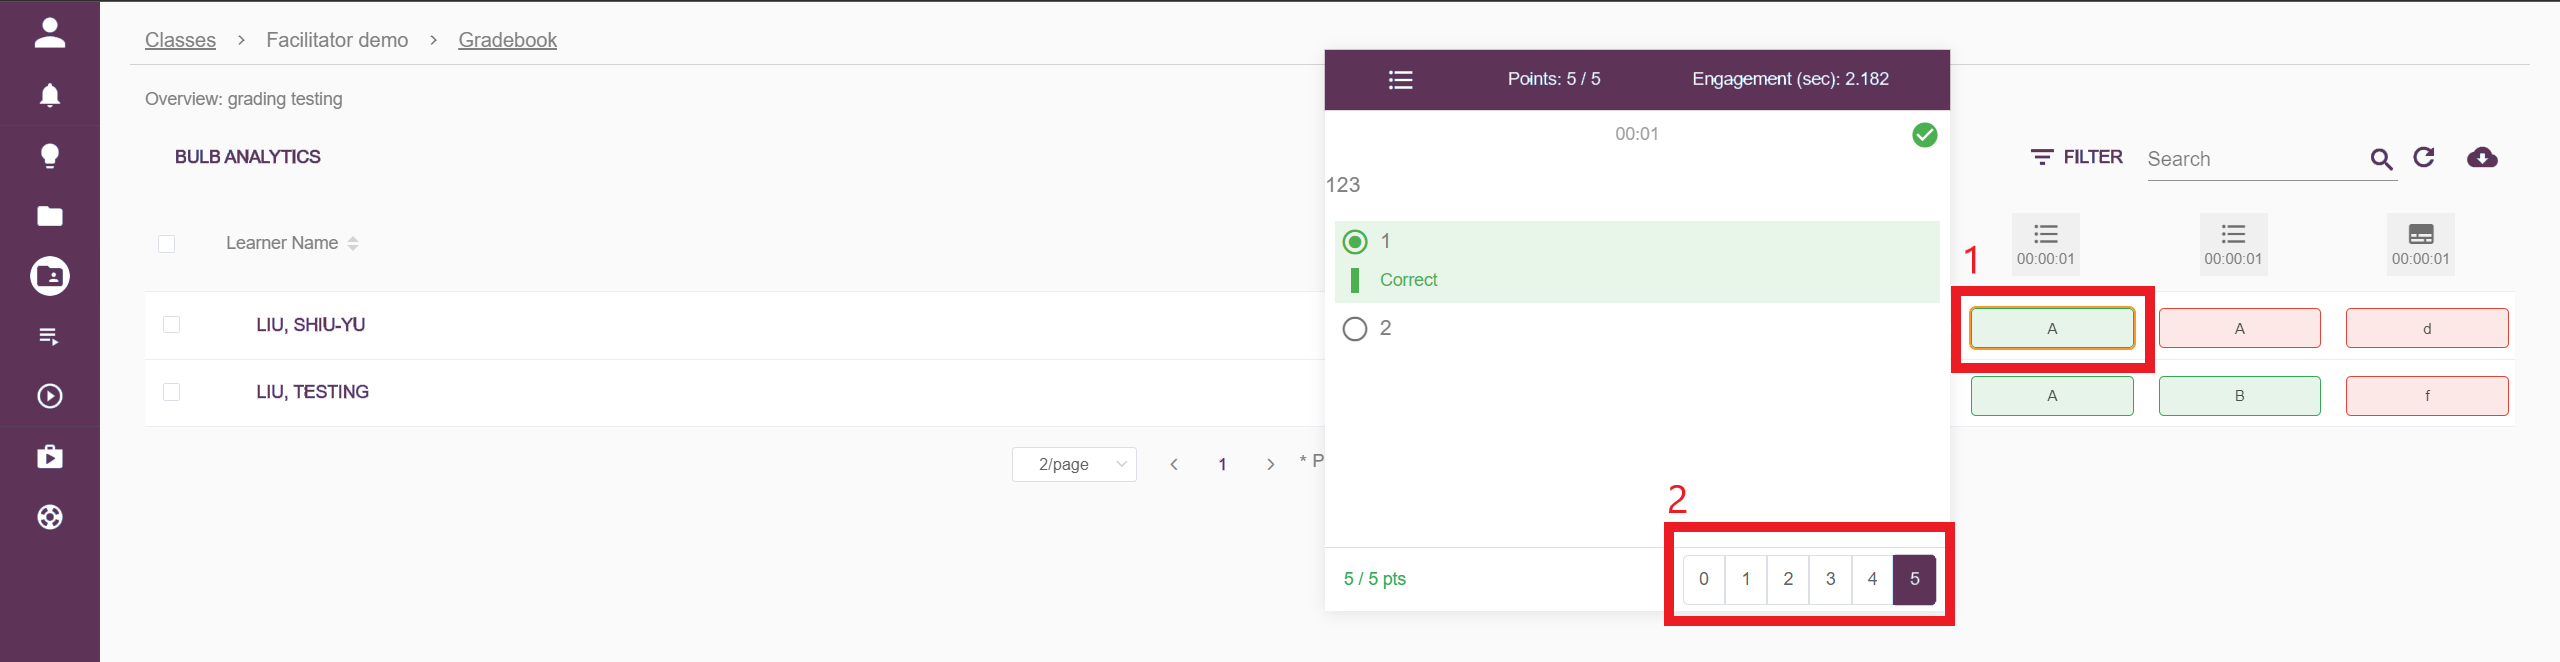
-
To export the data from this bulb, please click the data export icon on the top right.
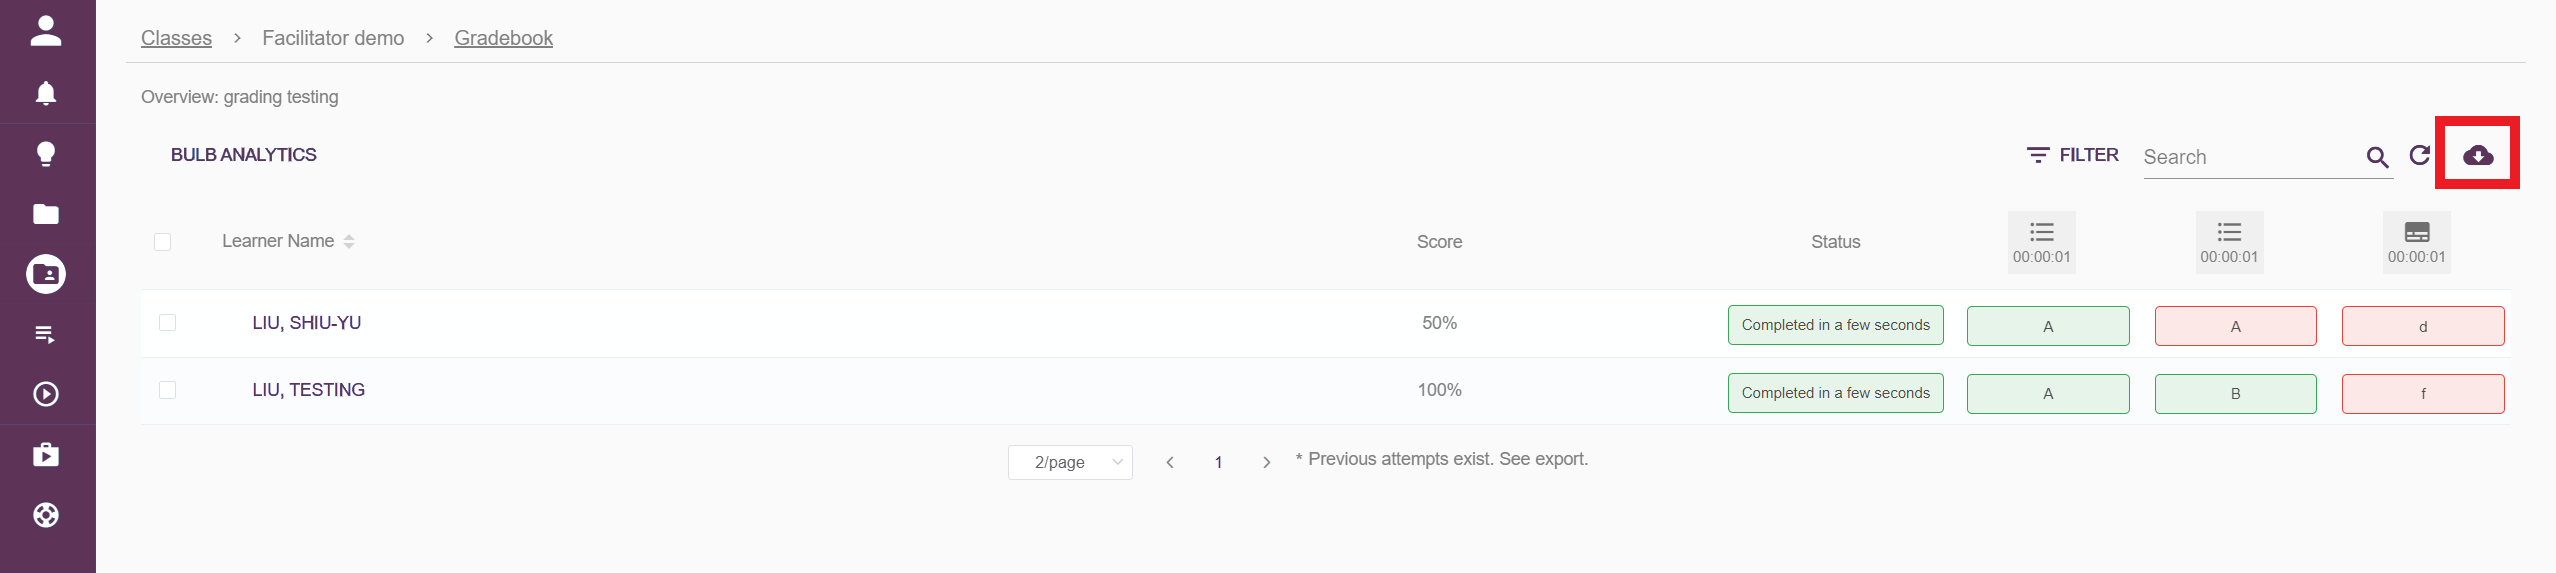
-
The data export from the monitor page will also include each learner's start time, time spent, and completion time.


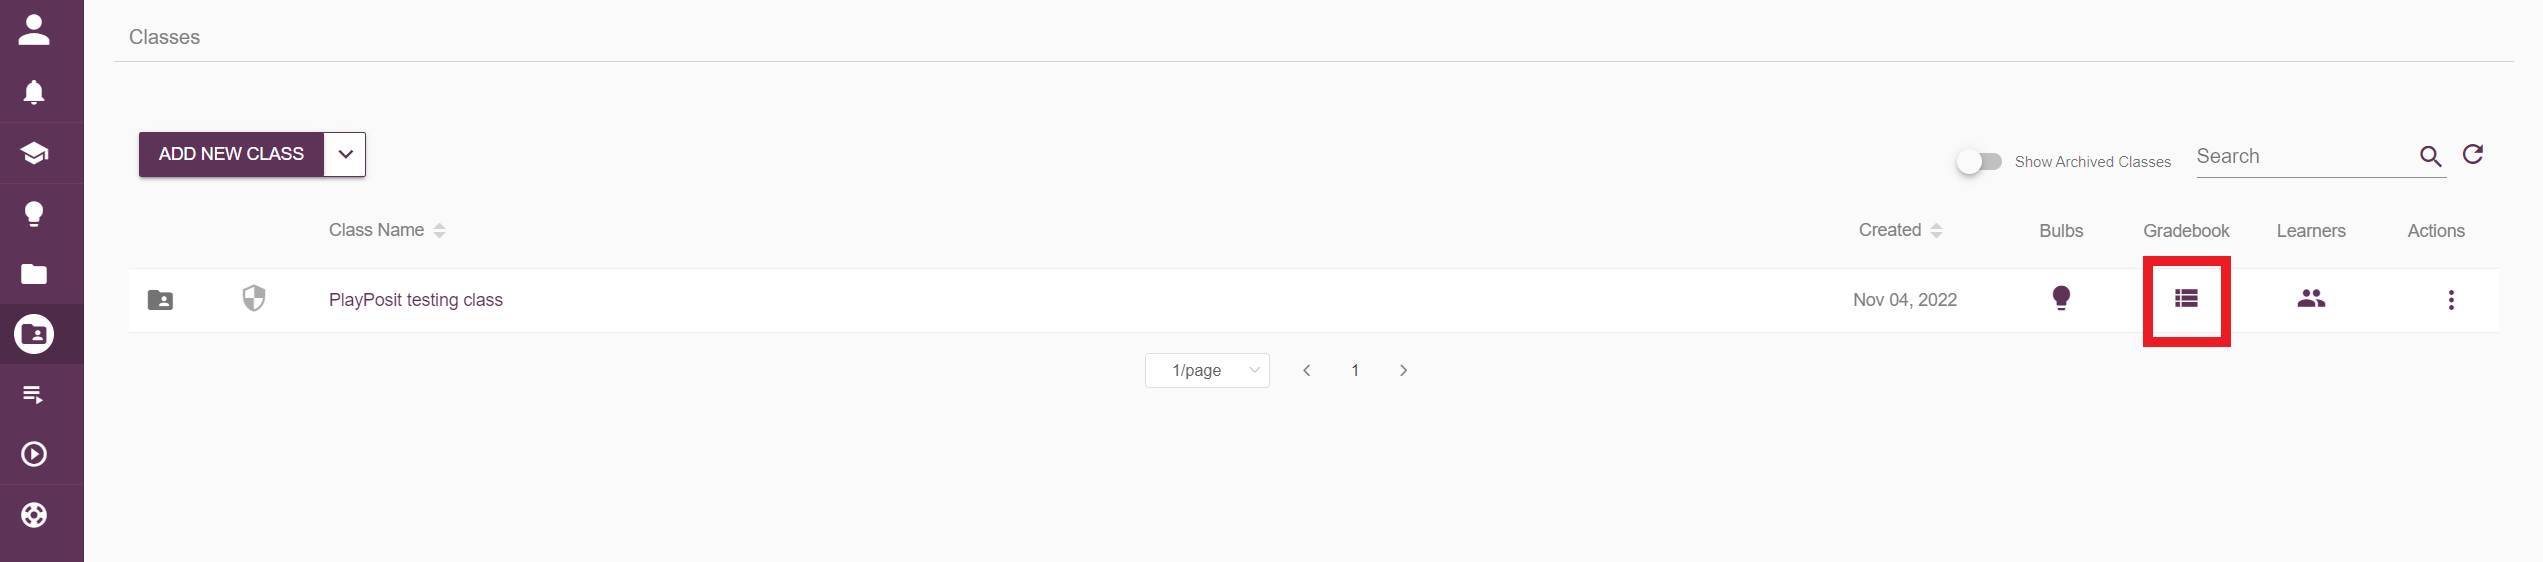
Go to the Classes page with the sidebar menu, and click the gradebook icon behind the desired class.
-
Learners' names and grades for each bulb can be found on the gradebook page. Teaching assistants and instructors can also download the data on this page into a CSV file by clicking the data export icon on the top right.
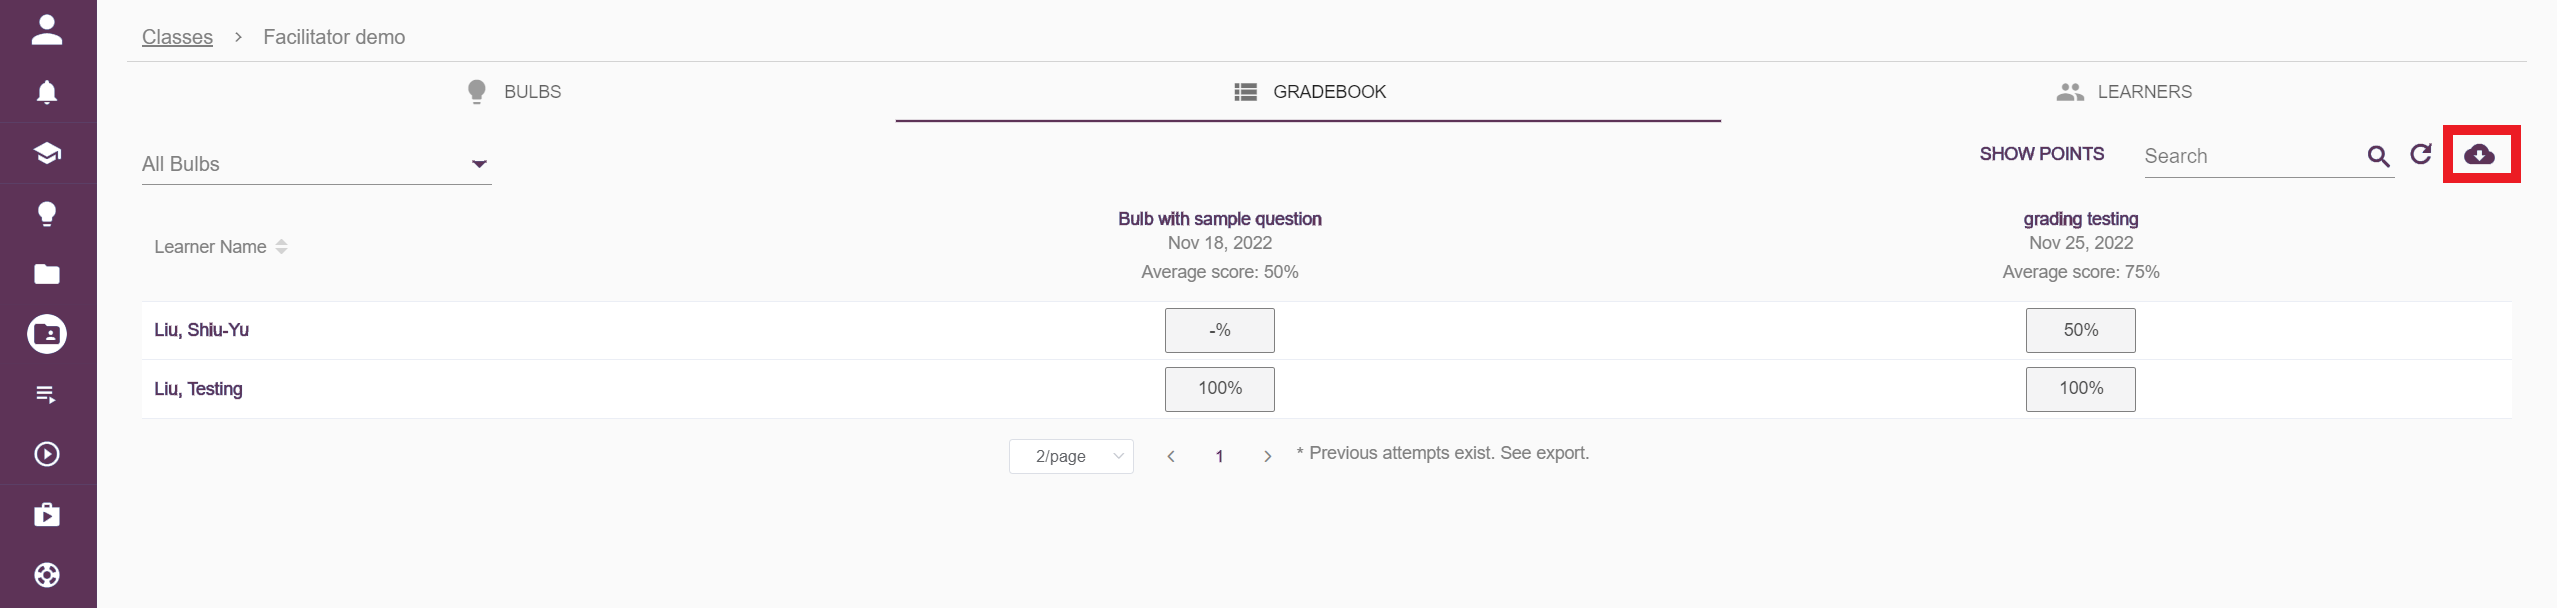
-
To monitor a bulb in the class, please click the bulb’s name on the top to enter the bulb’s monitor page.
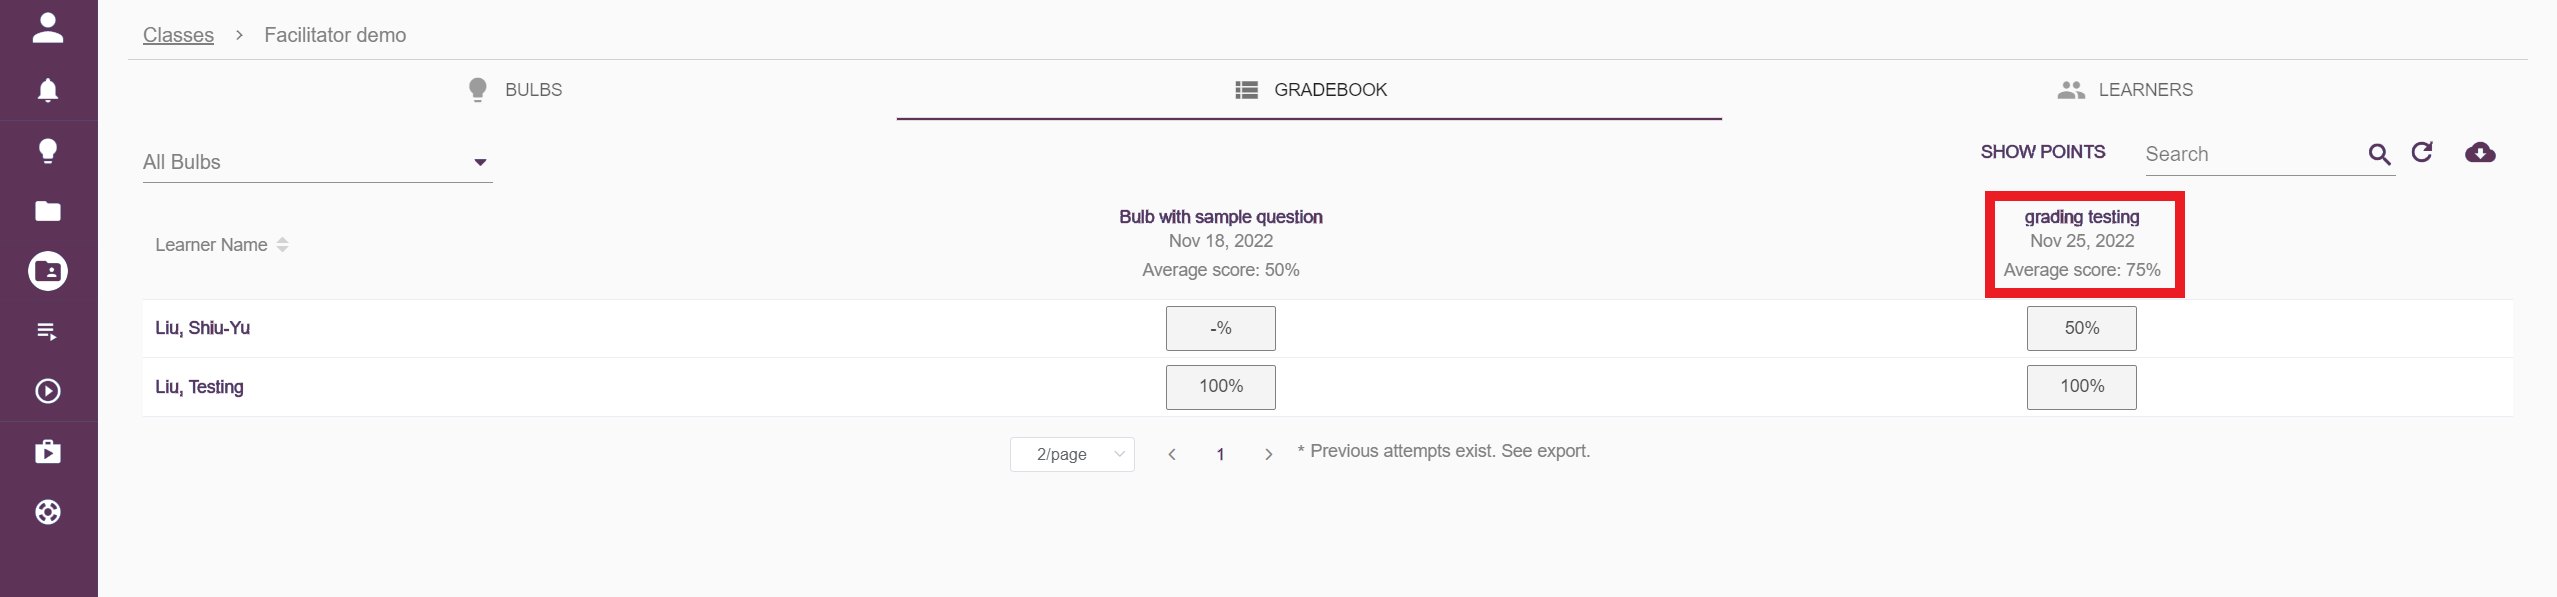
-
On the monitor page of the bulb, instructors can see learners’ responses to each interaction. Instructors can also click on the learner’s response to adjust the points. After viewing the monitor page, please click on the Back button on the browser to go back to the gradebook.
-
To export the data from this bulb, please click the data export icon on the top right.
-
The data export from the monitor page will also include each learner's start time, time spent, and completion time.
-
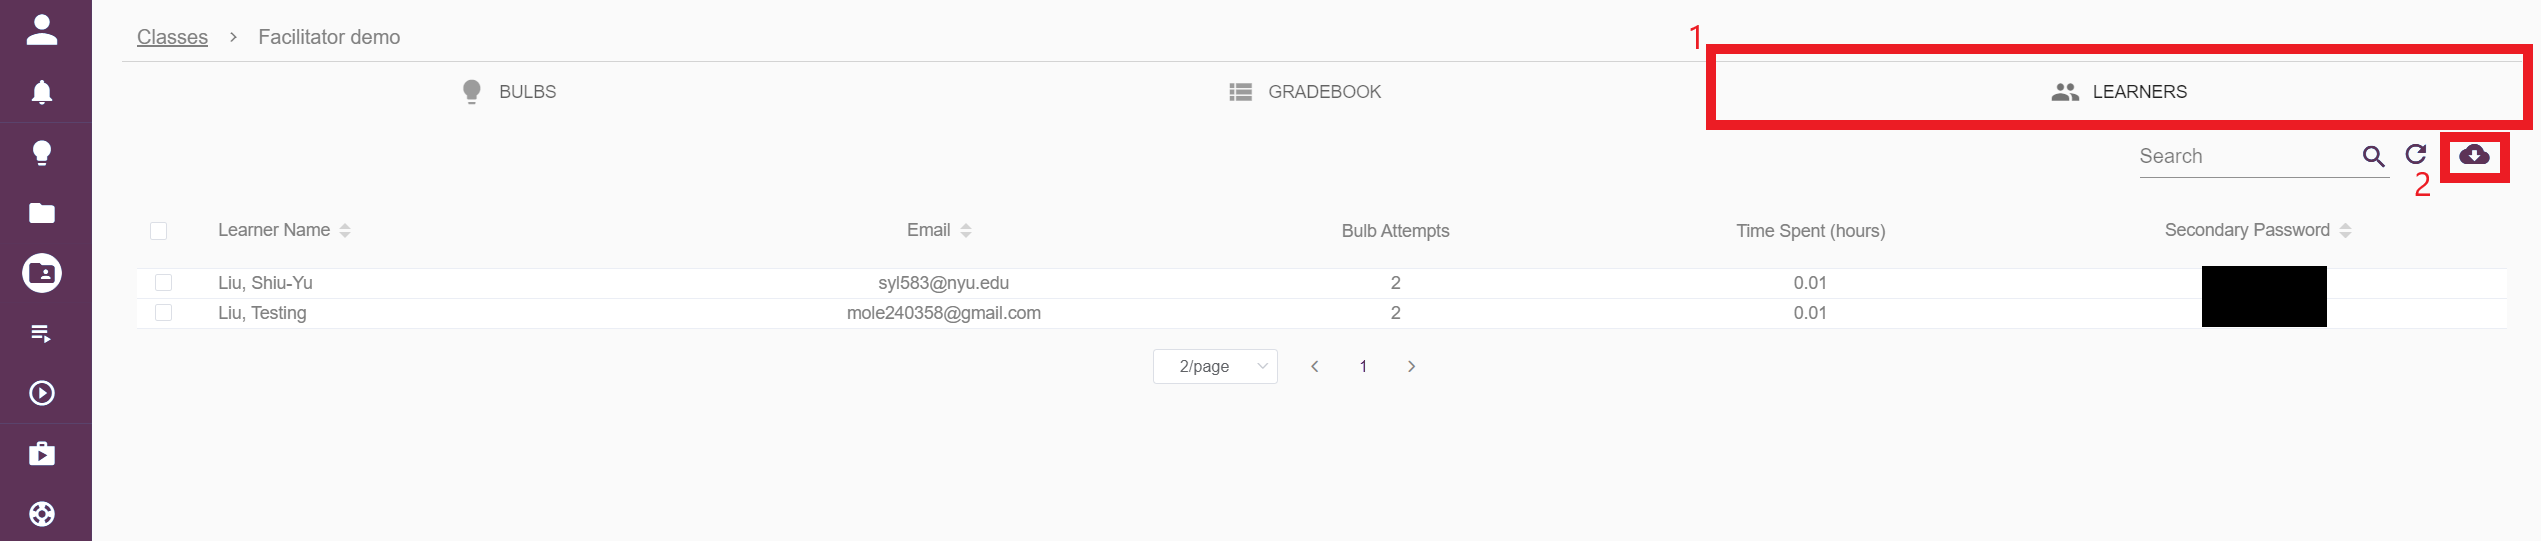
To view learners’ data, please click the Learners tab on the top to go to the learners page of this class. The bulb attempts and time spent by each learner can be found on this page. Please click on the data export icon on the top right to export the data on this page.


Please also see this video tutorial for more information about monitoring learners’ progress in PlayPosit.
The Class codes are different for the class owner and the teaching assistants. Which one should be shared with learners?
The class code generated by the class owner and the class code generated by the teaching assistant will both enroll learners in the same class, so both of them are safe to share with learners. To avoid confusion, we recommend using the class code generated by the class owner to enroll learners in the class.